

Configure VPC Gateway Endpoints for Private EC2 → S3 Communication
In AWS, keeping EC2 → S3 traffic inside the Amazon network boosts security, performance, and cost efficiency. A VPC Gateway Endpoint lets your instances access S3 without ever touching the public Internet or incurring per‑GB endpoint charges. In this guide, you’ll see how to create and configure a S3 Gateway Endpoint via the console tie it into your route tables and lock down your buckets to accept requests only via a VPC Gateway Endpoint . Let’s dive in!
Prerequisites
Before you begin, you’ll need:
- An AWS account with sufficient privileges.
- Basic familiarity with Amazon EC2, S3, VPC, and IAM concepts.
What Is a Gateway Endpoint and Why Use It?
A Gateway Endpoint provide reliable connectivity to Amazon S3 and DynamoDB without requiring an internet gateway or a NAT device for your VPC. Gateway endpoints do not use AWS PrivateLink, unlike other types of VPC endpoints.
Key benefits:
-
Security: Traffic stays within the AWS global network, eliminating exposure to the public Internet and reducing your attack surface.
-
Cost Efficiency: Gateway Endpoints are free there’s no per GB data processing charge unlike NAT Gateways or Interface Endpoints.
-
Simplicity: AWS automatically manages the availability, scaling, and redundancy of the endpoint. You only need to associate it with your VPC and route tables.
-
Performance: By bypassing Internet hops and NAT translation, you often see lower latency and higher throughput for EC2 to S3 transfers.
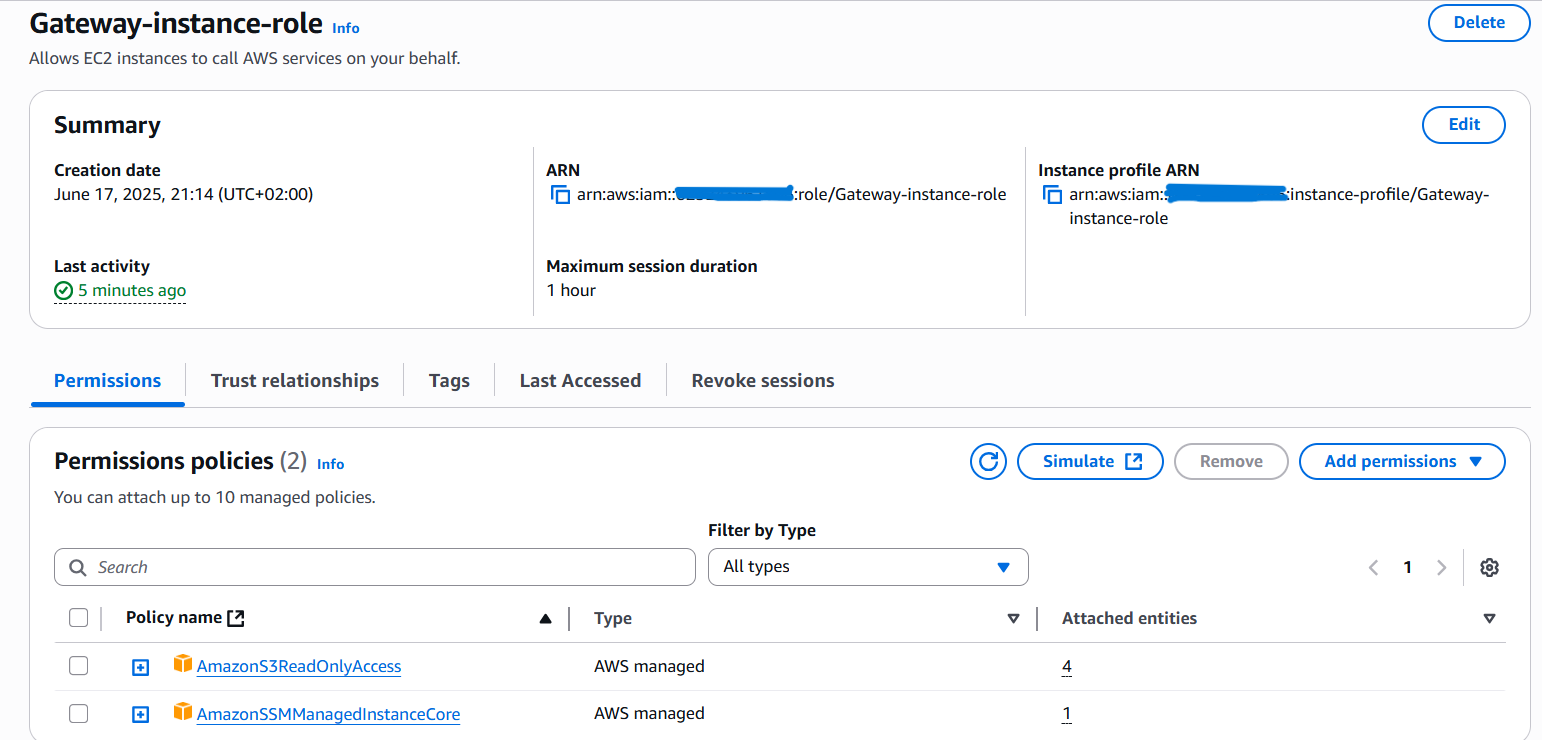
Create an IAM Role for EC2 → S3 and SSM Access
Before launching your EC2 instance, you need an IAM role that grants:
- AmazonSSMManagedInstanceCore so you can connect to the instance via AWS Systems Manager (SSM).
- AmazonS3ReadOnlyAccess so the instance can list and fetch objects from your S3 buckets.
Steps to Create the Role
-
Open the IAM Console
Navigate to IAM → Roles → Create role. -
Select Trusted Entity
- Choose AWS service.
- Under Use case, select EC2 and click Next.
-
Attach Managed Policies
- Search for and attach the AmazonSSMManagedInstanceCore policy.
- Search for and attach the AmazonS3ReadOnlyAccess policy.
- Click Next once both policies are selected.
-
Name and Review
- Give your role a clear name, for example:
Gateway-instance-role - Review the trusted entities and attached policies, then click Create role.
- Give your role a clear name, for example:
Launch an EC2 Instance with the IAM Role
Now that your IAM role is ready, let’s launch the EC2 instance that will use it:
-
Open the EC2 Console
Go to EC2 → Instances → Launch instances. -
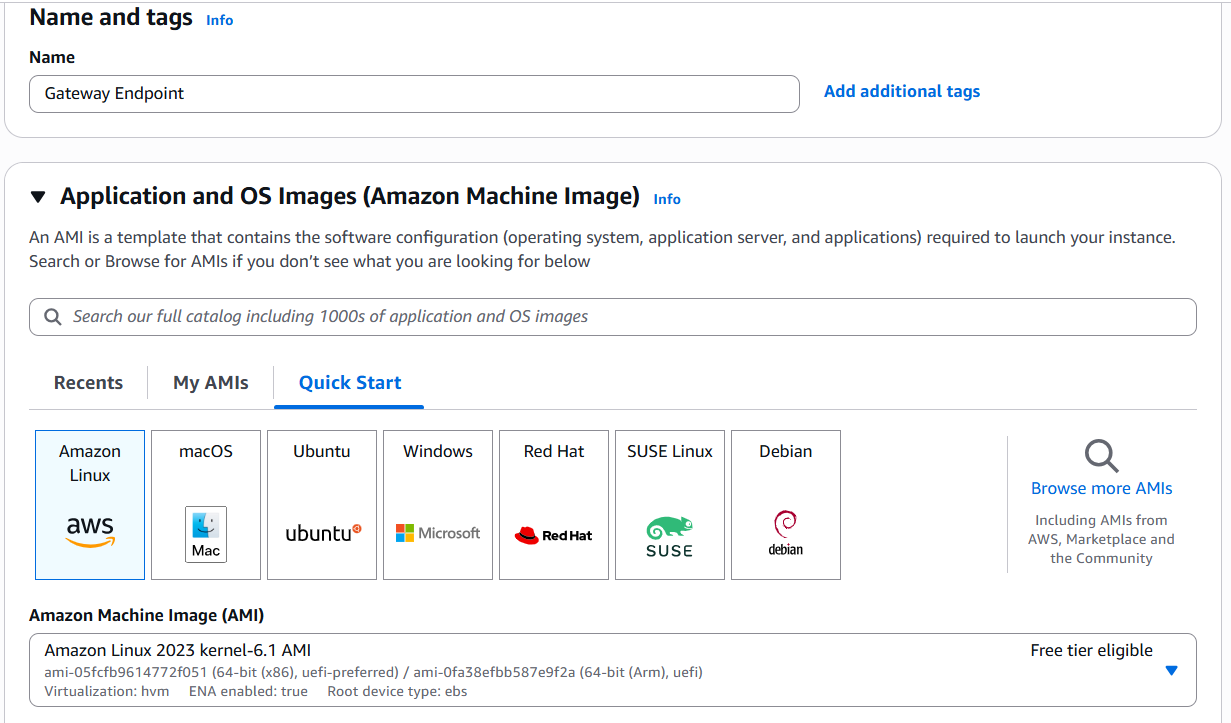
Choose AMI
- Select Amazon Linux 2023
-
Choose Instance Type
- Pick a suitable instance size (e.g., t3.micro for testing).
-
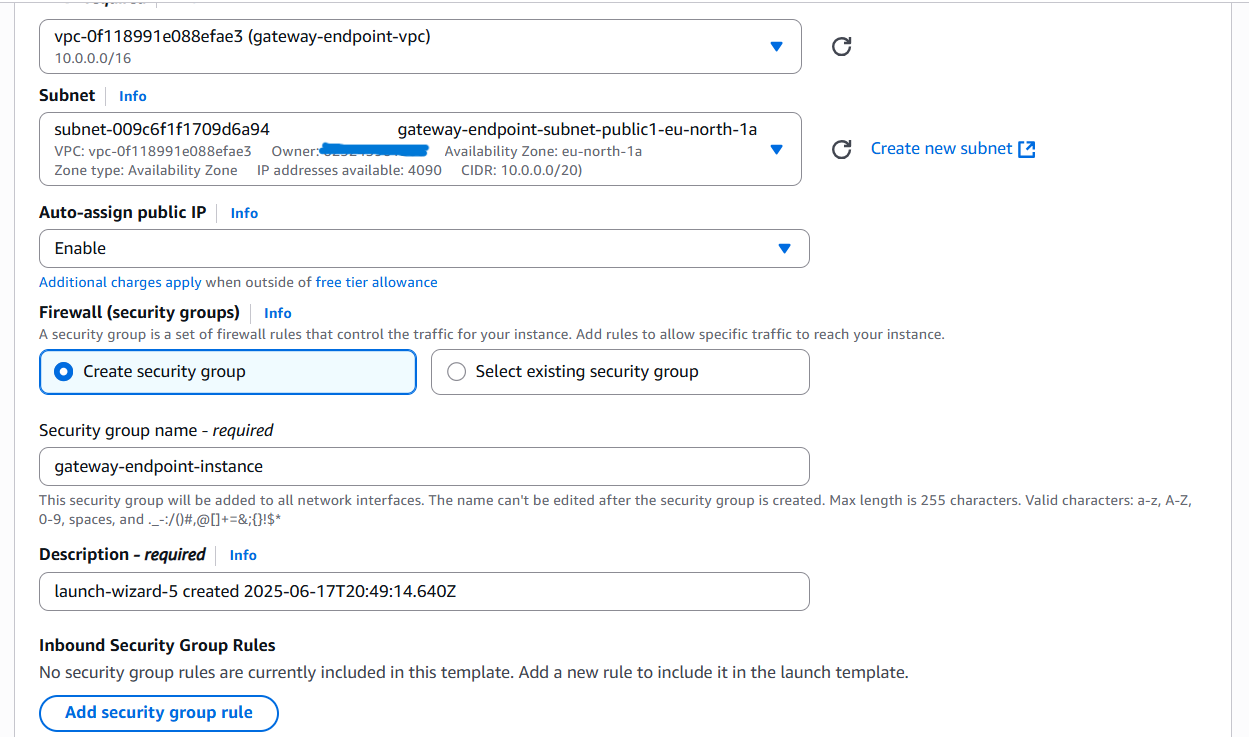
Configure Instance Details
- Network: Select your VPC.
- Subnet: Choose a public subnet (so it has Internet egress for SSM).
- Auto-assign Public IP: Enabled.
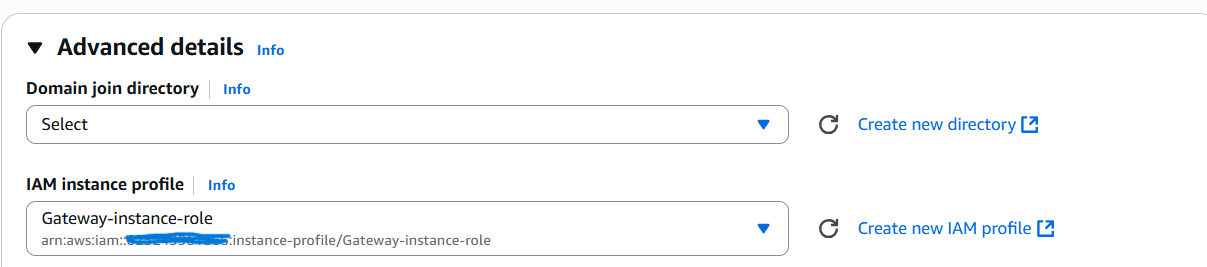
- IAM Role: Attach the Gateway-instance-role you created.
-
Configure Security Group
- Create a security group that does not allow SSH (TCP 22).
- Ensure outbound traffic to S3 is allowed (default all‑outbound is fine).
-
Skip Key Pair
- Under Key pair (login), select Proceed without a key pair.
-
Review and Launch
- Verify all settings (AMI, subnet, IAM role, security group).
- Click Launch instance.
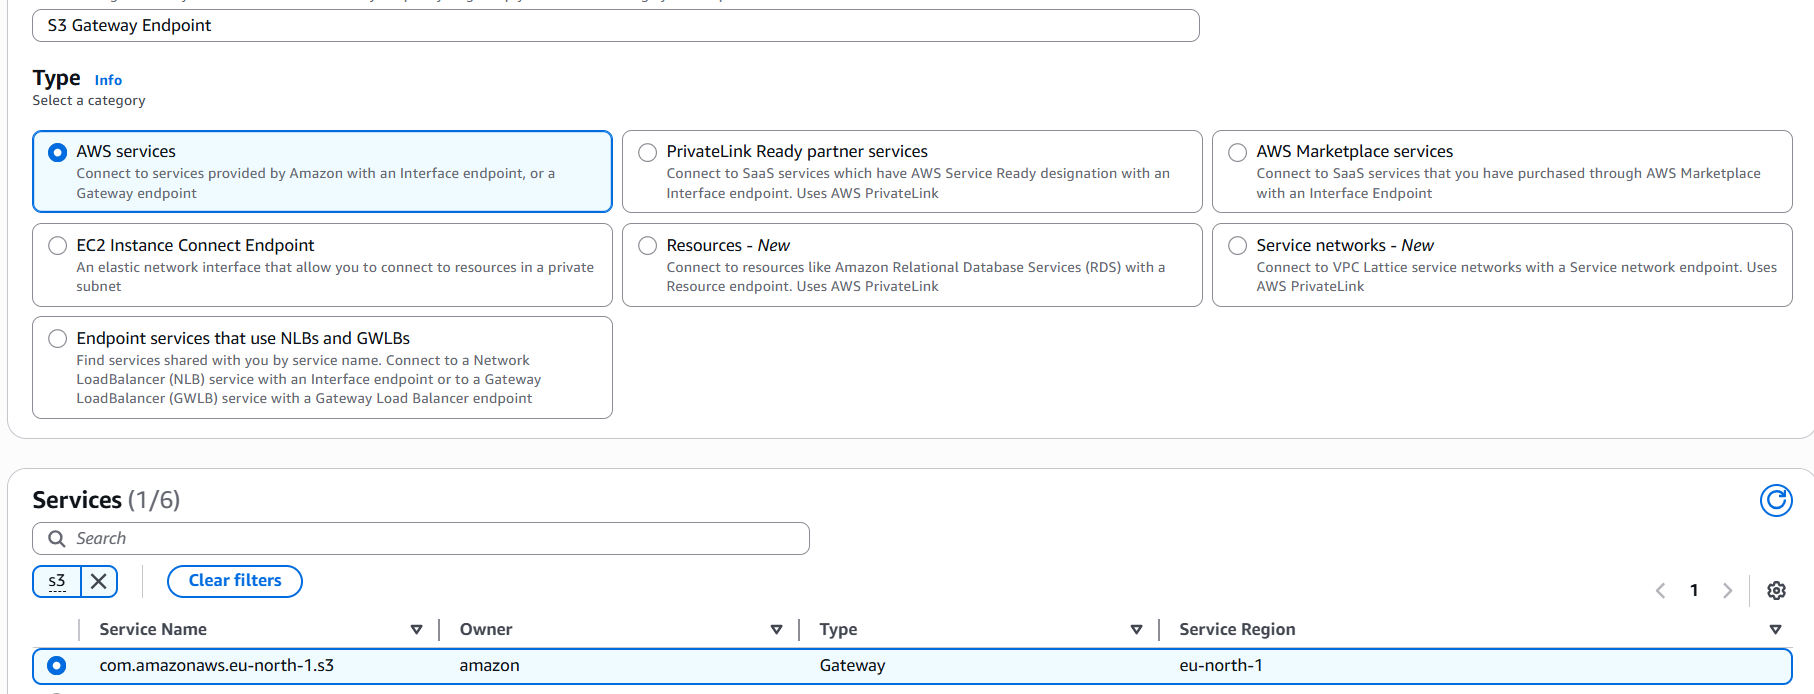
Create the S3 Gateway Endpoint
With your EC2 instance in place, the next step is to provision the VPC Gateway Endpoint that will route all S3 traffic privately over the AWS network.
-
Open the VPC Console
Navigate to VPC → Endpoints in the AWS Management Console. -
Start Endpoint Creation
Click Create endpoint. -
Select the Service
- Under Service category, choose AWS services.
- In Service name, find and select com.amazonaws.region.s3 (e.g.
com.amazonaws.eu-north-1.s3).
-
Configure the Endpoint
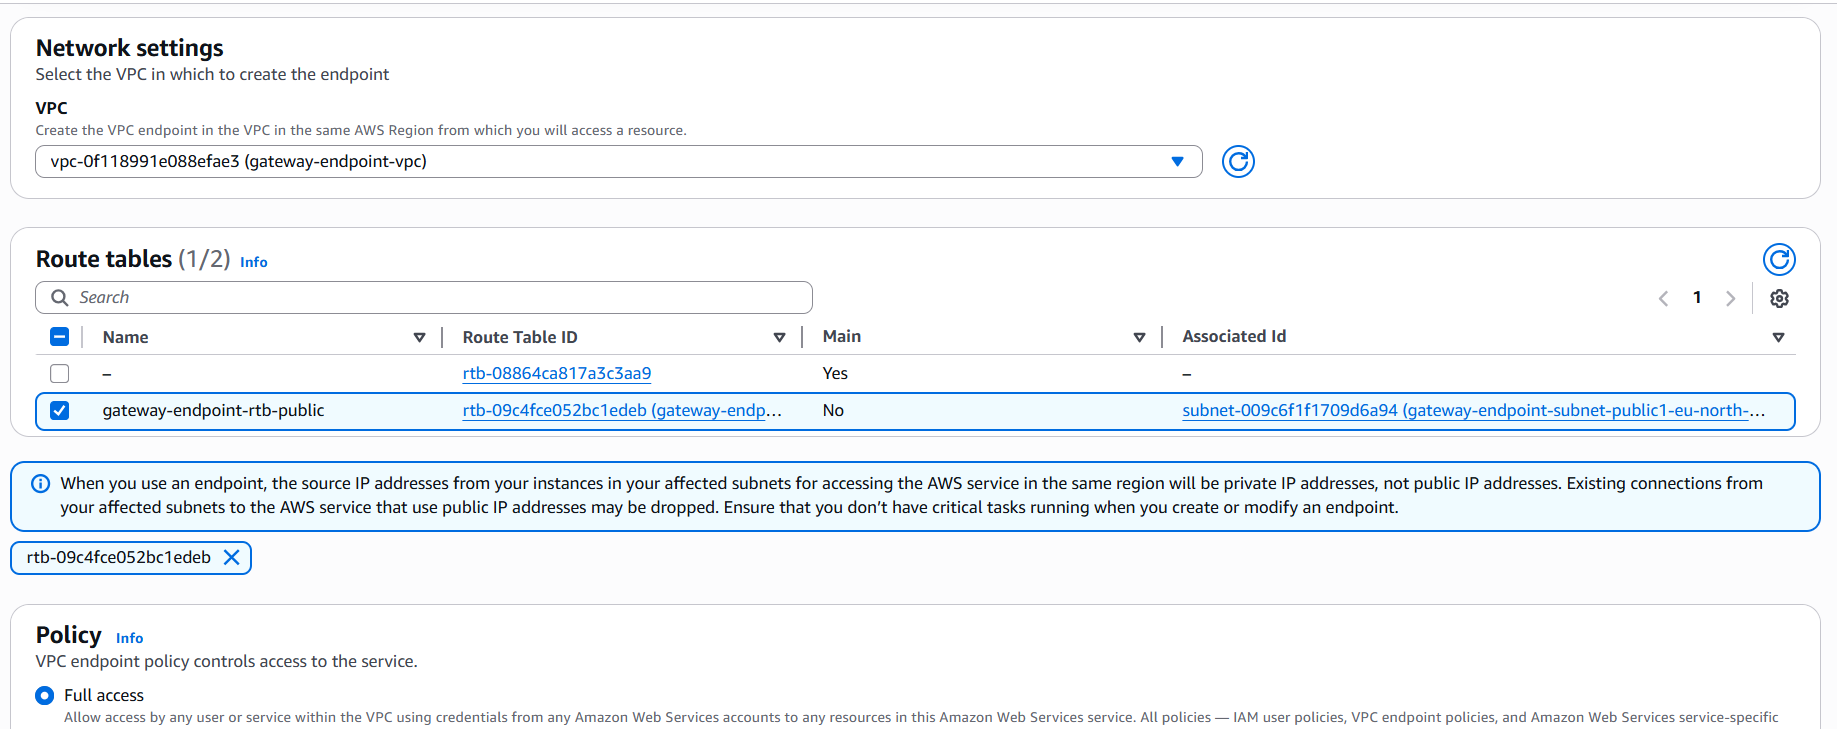
- VPC: Select the same VPC where your EC2 instance resides.
- Subnets & route tables: select the same subnet where your EC2 instance resides
-
Policy
- For a quick test, choose Full access.
- Create Endpoint
Click Create endpoint.
You should now see the endpoint in the list, with a status of Available once AWS has provisioned it.
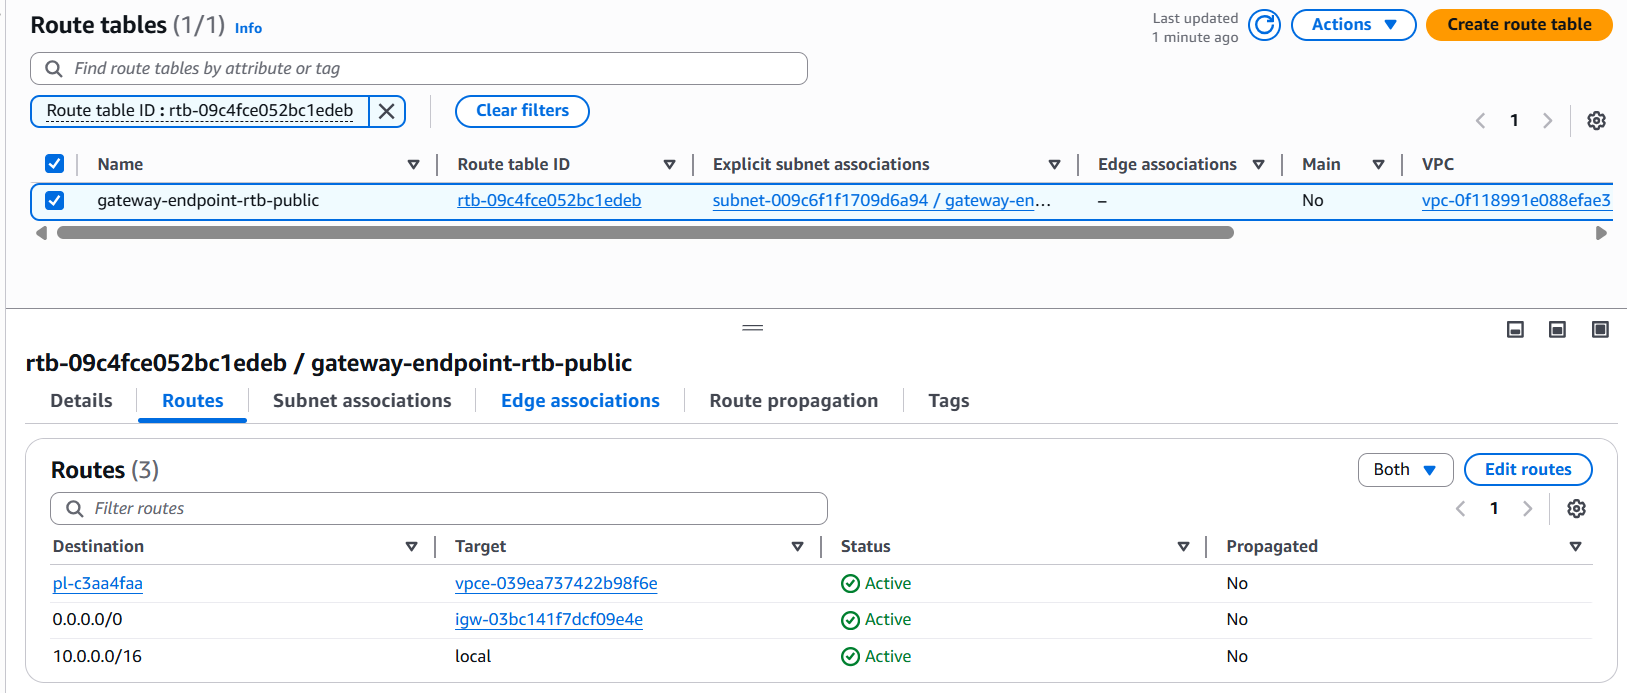
Once the endpoint is available, AWS automatically updates each selected route table with an entry pointing S3 prefix traffic (e.g. pl-c3aa4faa) to the endpoint no further route table edits are needed. You’re now ready to configure your endpoint and bucket policies to lock down access.
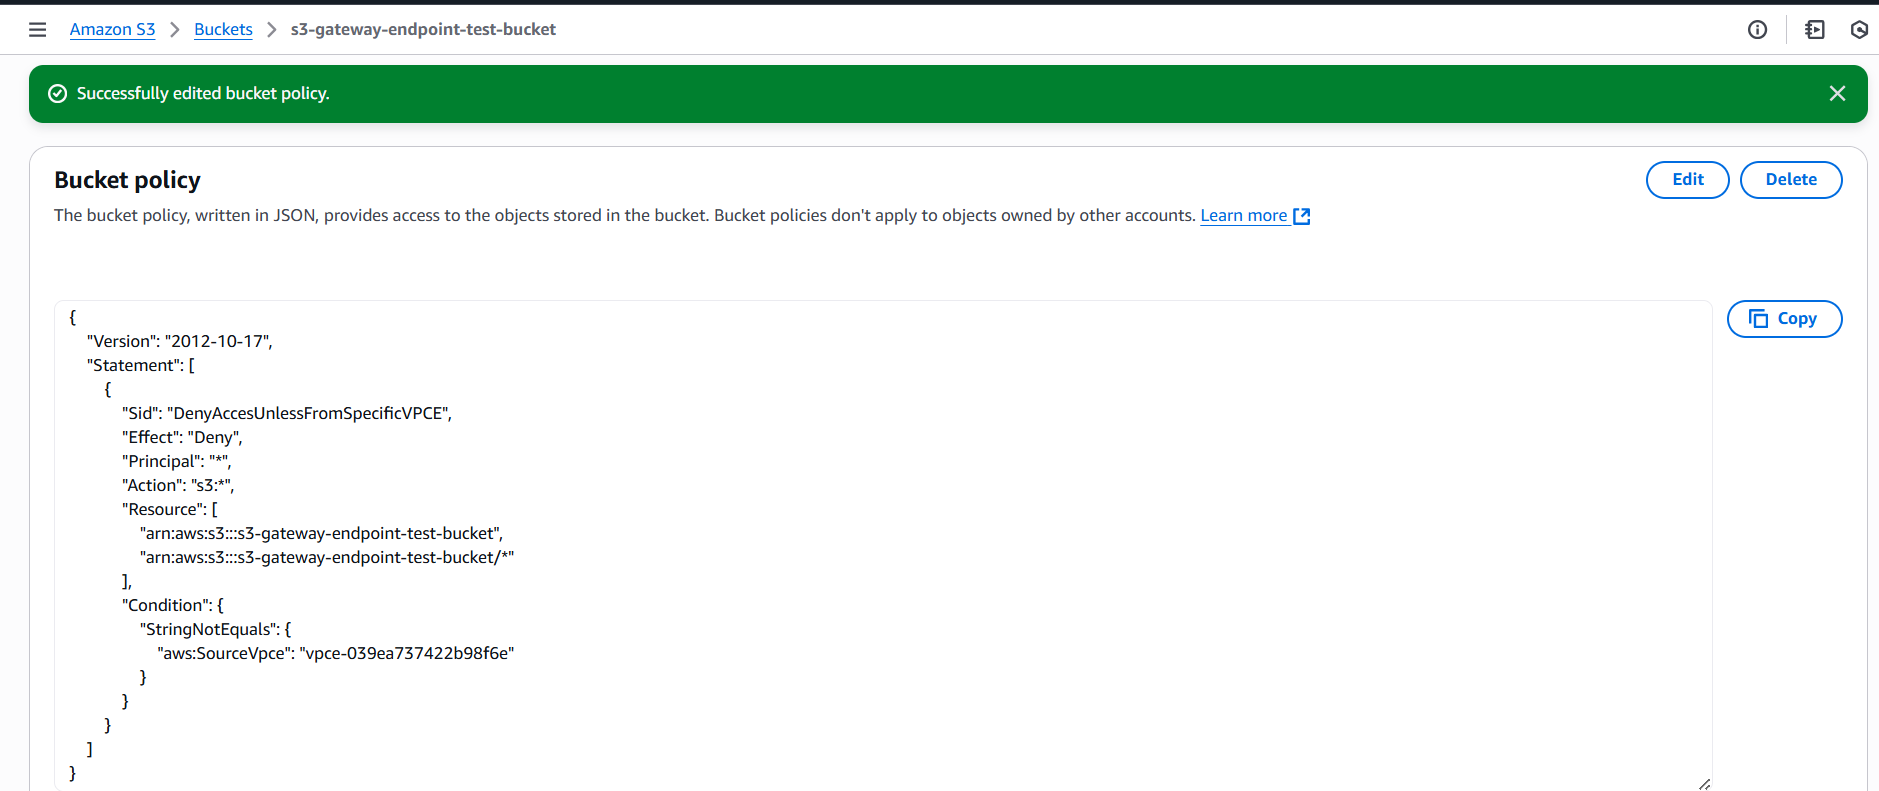
Create Your S3 Bucket and Lock It Down to the VPC Gateway Endpoint
Now that your Gateway Endpoint is live, let’s provision the S3 bucket and apply a bucket policy so that only requests coming through your endpoint can succeed.
Create the S3 Bucket
-
Open the S3 Console
Navigate to S3 → Create bucket. -
Bucket Basics
- Bucket name: e.g.
s3-gateway-endpoint-test-bucket. - Region: Same region as your VPC and endpoint.
- Bucket name: e.g.
-
Review and Create
Click Create bucket.
Apply a Bucket Policy Restricting Access to Your Endpoint
To ensure only traffic arriving via your VPC Gateway Endpoint (vpce-039ea737422b98f6e) can access this bucket, attach the following bucket policy:
{
  "Version": "2012-10-17",
  "Statement": [
    {
      "Sid": "DenyAccesUnlessFromSpecificVPCE",
      "Effect": "Deny",
      "Principal": "*",
      "Action": "s3:*",
      "Resource": [
        "arn:aws:s3:::s3-gateway-endpoint-test-bucket",
        "arn:aws:s3:::s3-gateway-endpoint-test-bucket/*"
      ],
      "Condition": {
        "StringNotEquals": {
          "aws:SourceVpce": "vpce-039ea737422b98f6e"
        }
      }
    }
  ]
}
Testing the Private EC2 ↔ S3 Communication
Once your Gateway Endpoint and bucket policy are in place, validate that your EC2 instance can reach the S3 bucket only via the endpoint and never over the public Internet.
-
Start an SSM Session from the AWS Console
-
In the AWS Management Console, go to EC2 → Instances, select your instance, and click Connect.
-
Choose the Session Manager tab and click Connect.
-
-
Test S3 Access via the Gateway Endpoint
# List your bucket contents aws s3 ls s3://s3-gateway-endpoint-test-bucket- Success: You should see the bucket’s contents without error.
-
Validate Endpoint‑Only Enforcement
Temporarily detach the endpoint from your route tables, then retry:- Expected: Access denied (bucket policy blocks non‑endpoint traffic).
🎉 Result: Your EC2 instance now accesses S3 privately through the VPC Gateway Endpoint. All public‑Internet attempts fail, and only endpoint‑originated requests succeed.
Conclusion
By adding an S3 VPC Gateway Endpoint, you’ve locked EC2 → S3 traffic inside AWS’s network boosting security, cutting latency, and avoiding per‑GB endpoint fees. You’ve seen how to create the necessary IAM role, launch an Amazon Linux 2023 instance with SSM only access, set up the endpoint, and enforce access via bucket policies.
Leave a Reply