
Deploy EKS Cluster on AWS Using eksctl
Introduction
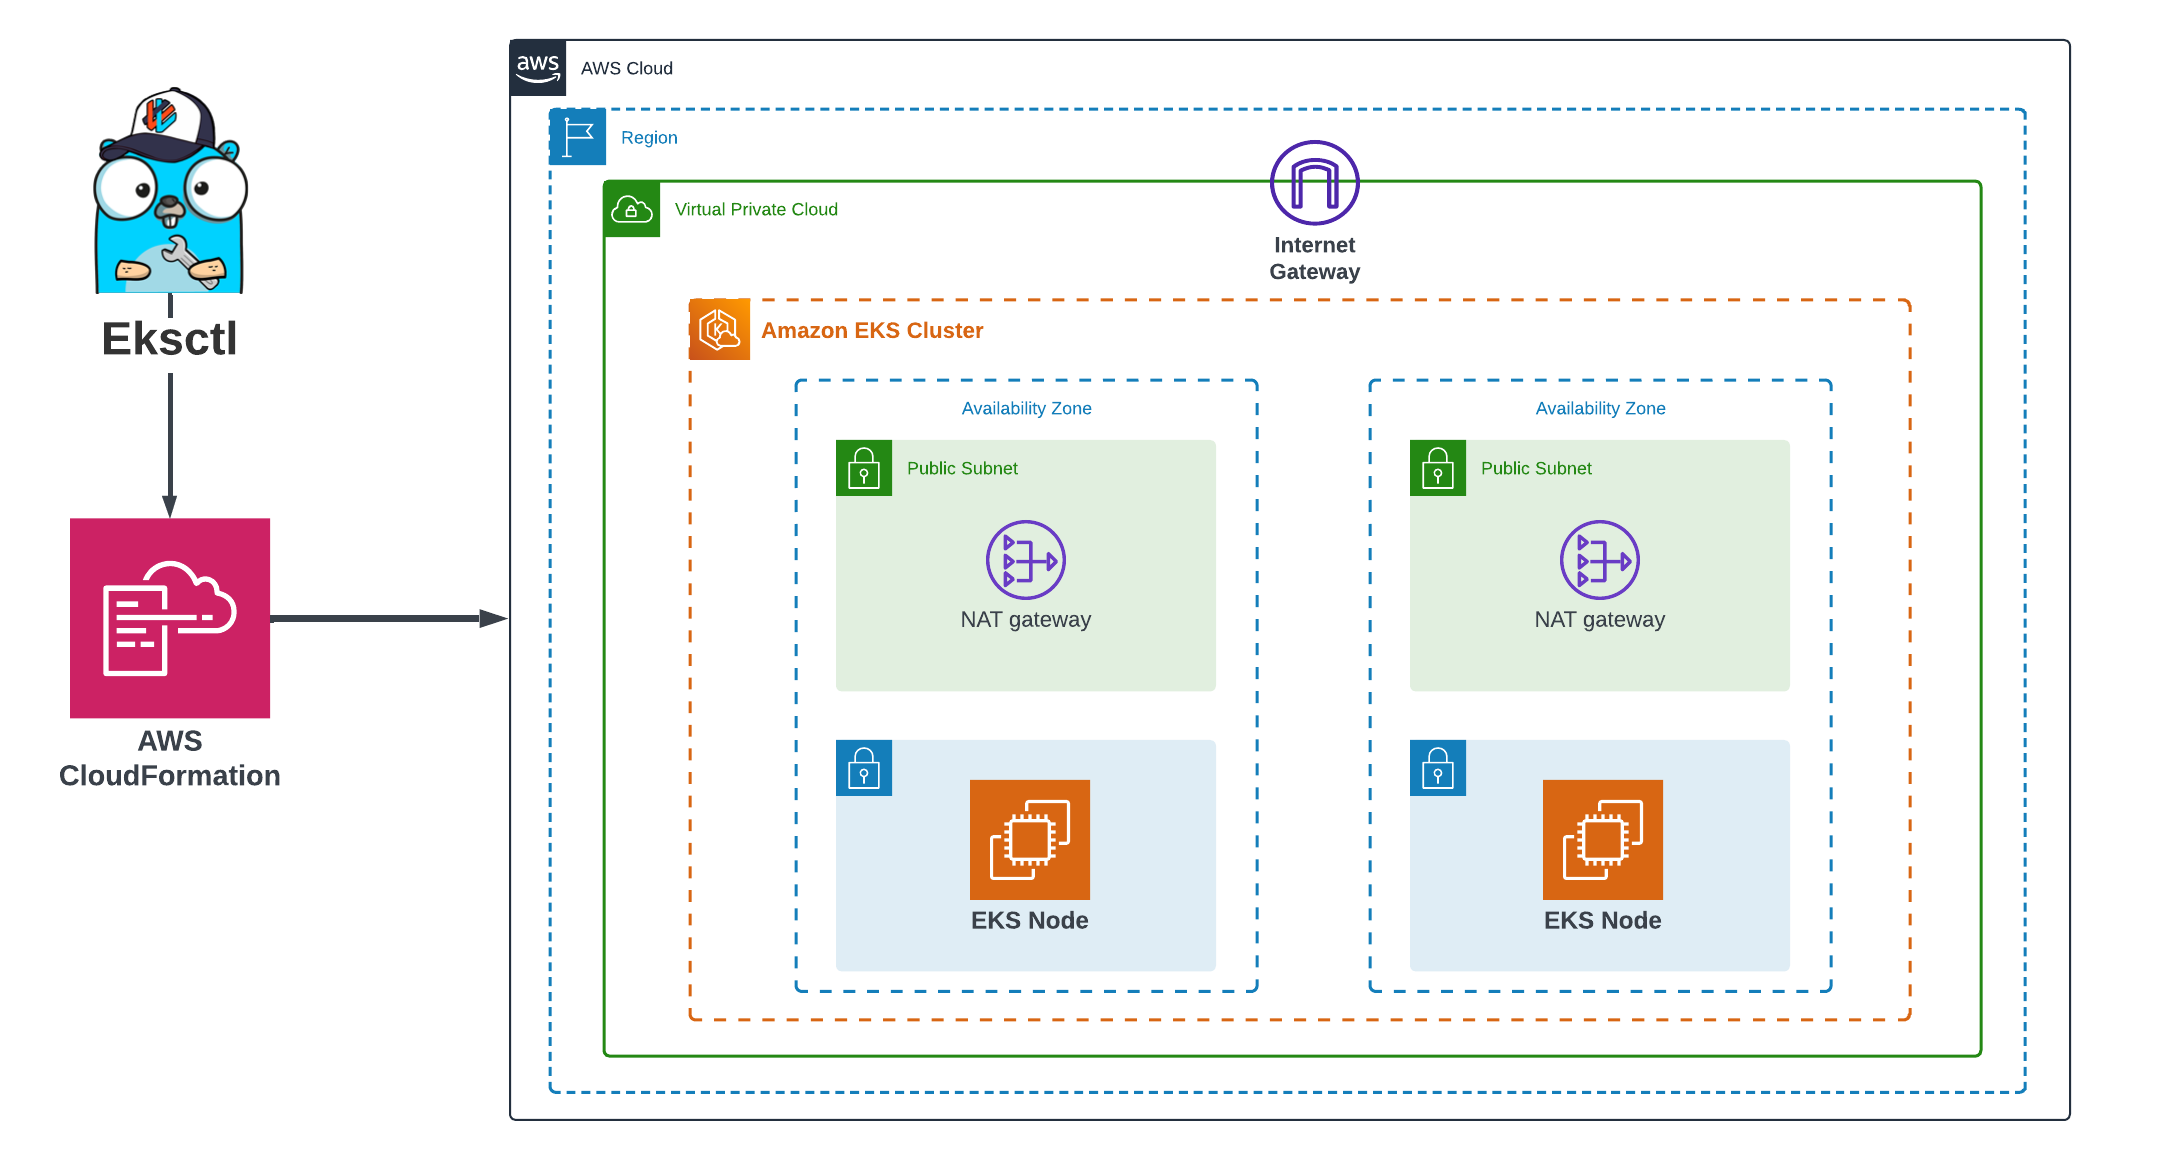
Amazon Elastic Kubernetes Service (Amazon EKS) has emerged as a leading solution for deploying, managing, and scaling containerized applications using Kubernetes on AWS without the need to install, operate, and maintain your own Kubernetes control plane. While you can deploy an EKS cluster using the AWS Management Console or AWS CLI, there is a handy tool called eksctl (EKS cluster tool) that simplifies the process of creating and managing EKS clusters. In this article, we’ll dive into eksctl, exploring what it is, how it works, and how you can leverage it to deploy EKS clusters effortlessly.
Prerequisites
Before proceeding with deploying EKS clusters using eksctl, ensure you have the following prerequisites:
-
AWS Account: You’ll need access to an AWS account with permissions to create and manage EKS clusters. If you don’t have an AWS account yet, you can sign up here.
- kubectl: eksctl relies on kubectl, the Kubernetes command-line tool, for interacting with Kubernetes clusters. Make sure you have kubectl installed. You can install kubectl by following the instructions here.
What is eksctl?
Eksctl is a simple command-line tool for creating and managing Kubernetes clusters on Amazon EKS. It is an open-source project developed and maintained by Weaveworks. The primary goal of eksctl is to provide an automated and streamlined way to deploy and manage EKS clusters, reducing the complexity and manual effort involved in the process.
Advantages of using eksctl for deploying EKS clusters
-
Simplicity: eksctl offers a simple and intuitive interface for creating and managing EKS clusters. With a few commands, users can provision fully functional Kubernetes clusters without needing to delve into the complexities of AWS infrastructure setup.
-
Automation: eksctl automates many of the manual tasks involved in deploying EKS clusters, such as creating AWS resources and configuring networking. This automation reduces the likelihood of human error and accelerates the cluster provisioning process.
-
Consistency: By abstracting away the intricacies of AWS and Kubernetes configurations, eksctl helps ensure consistency across EKS cluster deployments. This consistency simplifies management and troubleshooting, making it easier to maintain and scale Kubernetes workloads on AWS.
- Infrastructure as Code: eksctl supports the creation and management of AWS CloudFormation stacks for EKS cluster resources, enabling infrastructure-as-code practices and version control for your cluster configurations.
Installation and Configuration of eksctl
For this article, I’ll be using AWS CloudShell, with eksctl and other AWS tools pre-installed. If you’re using a different environment, you can find the installation instructions for your operating system on the eksctl installation page.
Verify eksctl Installation
With AWS CloudShell, eksctl should already be installed. To verify the installation, run the following command:
eksctl versionThis should print the version of eksctl installed on the CloudShell environment. If you see the version information, you’re good to go!
eksctl version
0.176.0
Deploying an EKS Cluster with eksctl
Create a cluster.yaml Configuration File
The first step in deploying an EKS cluster with eksctl is to create a configuration file that defines the desired cluster settings. eksctl supports creating clusters based on a YAML configuration file, allowing you to specify various parameters and customizations. Create a new file named cluster.yaml and add the following minimal configuration:
apiVersion: eksctl.io/v1alpha5
kind: ClusterConfig

metadata:
  name: my-eks-cluster
  region: eu-north-1

managedNodeGroups:
  - name: ng-1-workers
    instanceType: t3.medium
    minSize: 2
    maxSize: 4
    desiredCapacity: 3
This configuration specifies a cluster named my-eks-cluster in the eu-north-1 region, with a managed node group ng-1-workers consisting of three t3.medium instances.
Create the EKS Cluster with eksctl
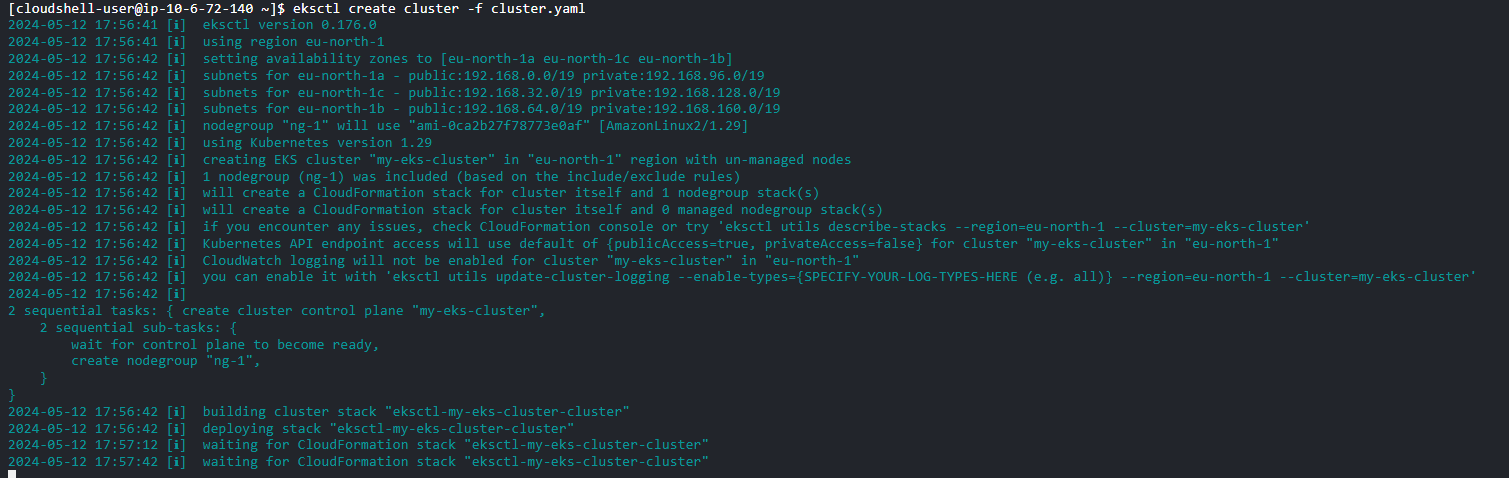
Once you have created your configuration file, you can use eksctl to create the EKS cluster by running the following command in your terminal:
eksctl create cluster -f cluster.yamlThis command will initiate the cluster creation process, which may take several minutes to complete. eksctl will provision the necessary AWS resources, including the EKS control plane, worker nodes, networking components, and IAM roles.


Verify Cluster Deployment
Once the cluster creation process is complete, eksctl will automatically update your kubeconfig file with the necessary information to connect to the new EKS cluster using kubectl. You can verify that the cluster is up and running by running:
kubectl get nodes
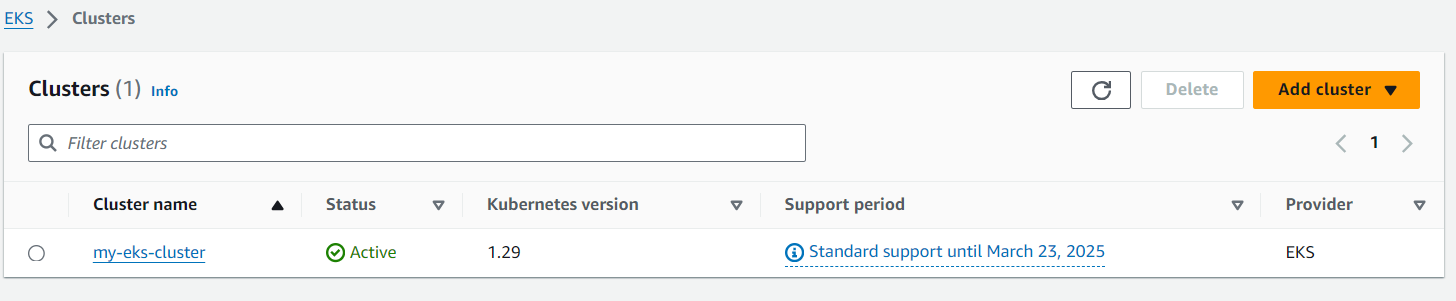
This command should list the worker nodes in the newly created EKS cluster. If you see the worker nodes listed, it means the cluster deployment was successful. You can also check the cluster status using the eksctl command:
eksctl get cluster --name my-eks-clusterThis command will display detailed information about your EKS cluster, including the cluster status, Kubernetes version, and other relevant details.
Managing Worker Nodes
In addition to creating and deploying EKS clusters, eksctl also provides functionality to manage worker node groups within your cluster. This includes the ability to add or remove node groups as needed, allowing you to scale your compute resources based on your application’s demands.
Adding a Worker Node Group
As your workload grows, you may need to increase the number of worker nodes in your cluster to accommodate additional pods or to distribute the load across multiple node groups. eksctl makes it easy to add a new worker node group to an existing EKS cluster.
To add a new node group, use the eksctl create nodegroup command:
eksctl create nodegroup
  --cluster=my-eks-cluster
  --name=ng-2
  --node-type=t3.micro
  --nodes=3
This command will create a new node group named ng-2 with three t3.micro instances in the my-eks-cluster cluster. You can specify various parameters like the node type, number of nodes, and additional configurations like spot instances or custom node labels.

Removing a Worker Node Group
If you no longer need a particular worker node group, you can remove it from your EKS cluster using eksctl. This is useful when you want to scale down your cluster or replace an existing node group with a different configuration.
To remove a node group, use the eksctl delete nodegroup command:
eksctl delete nodegroup
  --cluster=my-eks-cluster
  --name=ng-1
This command will drain and remove the ng-1 node group from the my-eks-cluster cluster. eksctl will safely cordon and drain the nodes, ensuring that any running pods are rescheduled to other nodes before terminating the instances.
Deleting the EKS Cluster
When you no longer need your EKS cluster, you can use eksctl to delete it and all associated resources. This is an essential step to avoid incurring unnecessary costs and to maintain a clean AWS environment.
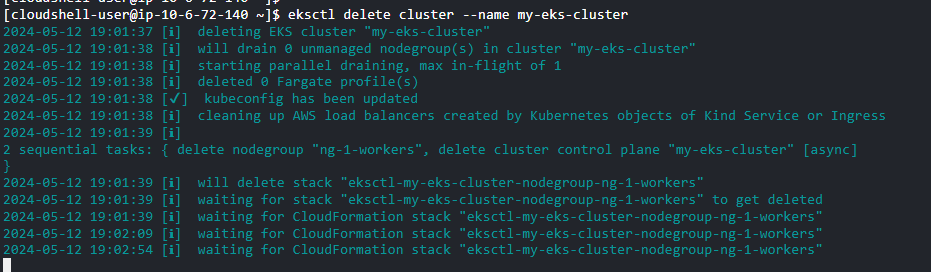
To delete your EKS cluster, run the following command:
eksctl delete cluster --name my-eks-clusterReplace my-eks-cluster with the name of your cluster.
The deletion process may take several minutes as eksctl drains and terminates the worker nodes, removes the EKS control plane, and deletes other associated resources like VPCs, subnets, and security groups.
Conclusion
Managing Kubernetes clusters on AWS can be complex, but tools like eksctl greatly simplify this process. In this article, we explored eksctl and discovered how it streamlines the deployment, management, and maintenance of EKS clusters on AWS.
Leave a Reply