

Leveraging RDS Proxy for Centralized Database Access with Terraform
Introduction
Amazon RDS (Relational Database Service) is an AWS-managed database service that facilitates deploying database instances in the cloud. However, managing client connections can be complex, especially to ensure high availability. This is why AWS offers RDS Proxy, a fully managed proxy service that centralizes connections to RDS instances.
In this article, we will see how to provision and configure RDS Proxy using Terraform. We will associate RDS Proxy with RDS instance and learn how to securely connect to it from applications. Using Terraform will greatly simplify deployment across different environments.
Prerequisites
Before we dive into provisioning and configuring AWS RDS Proxy with Terraform, you’ll need to have the following prerequisites in place:
- AWS Account: An AWS account to access and use AWS services.
- Terraform: Terraform installed and accessible from your system’s PATH.
- Terraform Modules Knowledge: Familiarity with Terraform modules is essential. If you’re new to Terraform modules, I recommend reading my article Demystifying Terraform Modules to get up to speed.
Understanding RDS Proxy
What is RDS Proxy?
AWS RDS Proxy is a fully managed, highly available database proxy service that sits between your applications and Amazon Relational Database Service (RDS) instances. It serves as a centralized access point for database connection, acting as an intermediary between your application and the underlying RDS instance.
How RDS Proxy Works
RDS Proxy establishes a persistent connection to your RDS instances and efficiently manages the pooling and sharing of these database connections across multiple applications. Applications communicate with RDS Proxy instead of connecting directly to the database instances, allowing RDS Proxy to handle connection management and routing transparently.
When an application needs to connect to the database, it establishes a connection with RDS Proxy. RDS Proxy then establishes a separate connection to the RDS instance and passes queries back and forth between the application and the database. This architecture allows RDS Proxy to manage the connection pool efficiently, reducing the overhead of creating and terminating database connections.
Key Features and Benefits
- Connection Pooling: RDS Proxy maintains a pool of database connections, reducing the overhead of establishing new connections for each application request.
- Improved Performance: By reusing existing connections and reducing the overhead of connection setup, RDS Proxy can improve overall application performance.
- Centralized Access Control: RDS Proxy acts as a single entry point for database connections, simplifying access control and security management.
- Compatibility: RDS Proxy works seamlessly with a variety of database engines supported by Amazon RDS, including MySQL, PostgreSQL, and Amazon Aurora.
Use Cases for Centralized Database Access
RDS Proxy is particularly useful in scenarios where you have multiple applications or microservices connecting to the same set of RDS instances. By centralizing database access through RDS Proxy, you can:
- Simplify Connection Management: Instead of each application managing its own database connections, RDS Proxy handles connection pooling and load balancing.
- Enhance Security: You can control access to your RDS instances through a single entry point, making it easier to implement security policies and auditing.
- Scale Efficiently: By sharing a pool of connections across multiple applications, RDS Proxy can help you scale your infrastructure more efficiently.
Setting up the Infrastructure with Terraform
Before we can provision and configure RDS Proxy, we need to set up the underlying infrastructure components using Terraform. Let’s start by creating two Terraform configuration files: provider.tf and network.tf.
provider.tf
provider "aws" {
  region = "eu-north-1"
}

terraform {
  required_providers {
    aws = {
      source = "hashicorp/aws"
    }
  }
}
In the provider.tf file, we specify the AWS provider and the region where we want to create our infrastructure.
network.tf
data "aws_vpc" "infrastructure_vpc" {
  id = "vpc-xxxxxxxx"
}

data "aws_subnet" "first_subnet" {
  id = "subnet-xxxxxxx"
}
data "aws_subnet" "second_subnet" {
  id = "subnet-xxxxxxxx"
}
In the network.tf file, we’re using the aws_vpc and aws_subnet data sources to reference an existing Virtual Private Cloud (VPC) and two subnets within that VPC.
You’ll need to replace the id values in the aws_vpc and aws_subnet blocks with the actual IDs of your VPC and subnets.
Setting Up the RDS Database with Terraform
In this section, we’ll create the necessary resources for our RDS database instance using Terraform.
Creating the Database Security Group
module "db_security_group" {
  source = "terraform-aws-modules/security-group/aws"
  name        = "MySQL Database security group"
  description = "Security group for MySQL"
  vpc_id      = data.aws_vpc.infrastructure_vpc.id

  ingress_with_cidr_blocks = [
    {
      from_port   = 3306
      to_port     = 3306
      protocol    = "tcp"
      description = " "
      cidr_blocks = "0.0.0.0/0"
    }
  ]
  egress_with_cidr_blocks = [
    {
      from_port   = 0
      to_port     = 0
      protocol    = -1
      description = " "
      cidr_blocks = "0.0.0.0/0"
    }
  ]
}
We begin by creating a security group for our MySQL database instance using the terraform-aws-modules/security-group/aws module. The security group allows inbound traffic on port 3306 (the default MySQL port) from any IP address (0.0.0.0/0). It also allows all outbound traffic.
While opening port 3306 to all IP addresses is convenient for this example, in a production environment, you should restrict access to trusted IP addresses.
Creating the Database Subnet Group
resource "aws_db_subnet_group" "database_subnet" {
  name       = "mydb-subnet-group"
  subnet_ids = [data.aws_subnet.first_subnet.id, data.aws_subnet.second_subnet.id]
}
Next, we create a database subnet group named db-group-demo using the two subnets specified previously in the network.tf file. This subnet group will be used to deploy the RDS database instances within specific subnets of your VPC, ensuring network isolation and high availability.
Creating the RDS Database Instance
In the following section, we’ll define the RDS database instance using the terraform-aws-modules/rds/aws module. The module configuration will include details such as the database engine, instance class, storage allocation, and other settings specific to your requirements.
module "db" {
  source = "terraform-aws-modules/rds/aws"

  identifier           = "mydb-identifier"
  engine               = "mysql"
  engine_version       = "8.0"
  family               = "mysql8.0"
  major_engine_version = "8.0"
  instance_class       = "db.t3.micro"

  allocated_storage           = 20
  max_allocated_storage       = 100
  manage_master_user_password = false

  db_name  = var.db_name
  username = var.db_username
  password = var.db_password
  port     = 3306

  multi_az               = false
  db_subnet_group_name   = aws_db_subnet_group.database_subnet.name
  vpc_security_group_ids = [module.db_security_group.security_group_id]

  skip_final_snapshot = true
  deletion_protection = false
}
Integrating RDS Proxy with Terraform
Now that we have set up the underlying infrastructure components using Terraform, we can proceed to integrate AWS RDS Proxy into our configuration.
Defining the RDS Proxy Resource
module "rds_proxy" {
  source = "terraform-aws-modules/rds-proxy/aws"

  name                   = "my-rds-proxy"
  iam_role_name          = "rds-proxy-role"
  vpc_subnet_ids         = [data.aws_subnet.first_subnet.id, data.aws_subnet.second_subnet.id]
  vpc_security_group_ids = [module.db_security_group.security_group_id]

  auth = {
    "${var.db_name}" = {
      description = "RDS MySQL superuser password"
      secret_arn  = module.secrets_manager.secret_arn
    }
  }

  # Target MySQL Instance
  engine_family = "MYSQL"
  debug_logging = true

  # Target RDS instance
  target_db_instance     = true
  db_instance_identifier = module.db.db_instance_identifier

  tags = {
    Terraform   = "true"
    Environment = "Test"
  }
}
In this block, we define the RDS Proxy resource using the terraform-aws-modules/rds-proxy/aws module.
Integrating AWS Secrets Manager
module "secrets_manager" {
  source = "terraform-aws-modules/secrets-manager/aws"

  # Secret
  name_prefix             = "mydb-secret"
  description             = "MySQL Secrets"
  recovery_window_in_days = 30

  # Policy
  create_policy       = true
  block_public_policy = true
  policy_statements = {
    read = {
      sid = "AllowAccountRead"
      principals = [{
        type        = "AWS"
        identifiers = ["arn:aws:iam::xxxxxxxxx:root"]
      }]
      actions   = ["secretsmanager:GetSecretValue"]
      resources = ["*"]
    }
  }

  secret_string = jsonencode({
    username = "${var.db_username}"
    password = "${var.db_password}"
  })

}
In this block, we use the terraform-aws-modules/secrets-manager/aws module to create an AWS Secrets Manager secret that stores the database credentials required for RDS Proxy to authenticate with the RDS instance.
Terraform Execution Commands
Here are the commands to initialize Terraform, review the execution plan, and apply the changes
terraform init
terraform plan
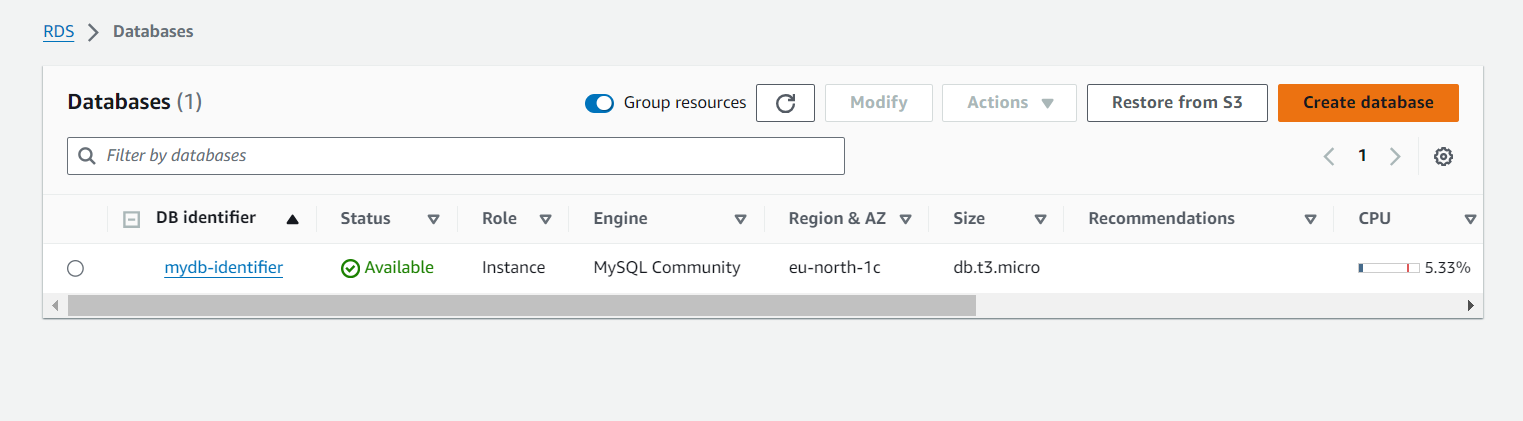
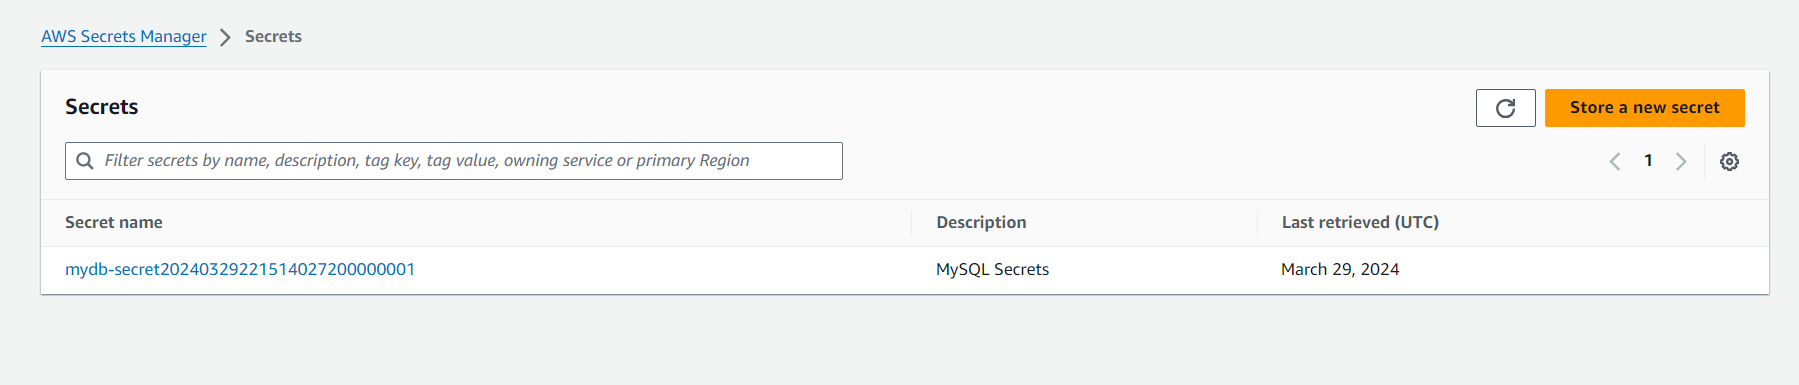
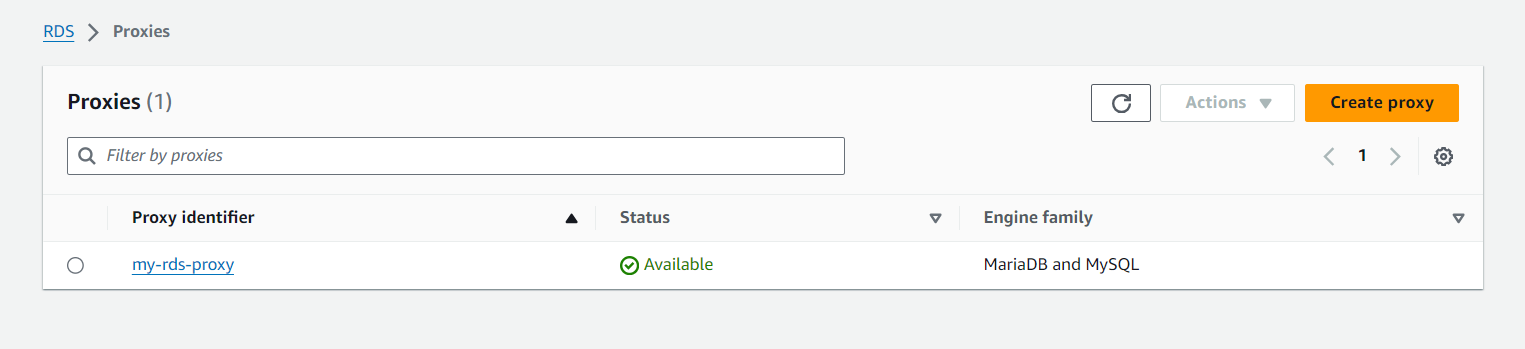
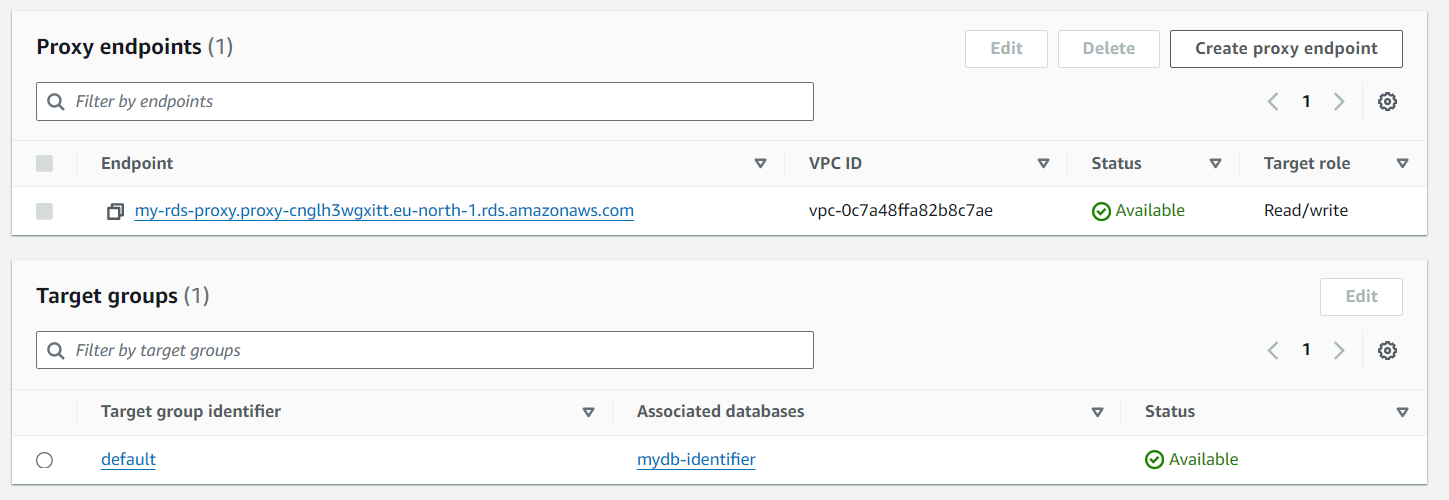
terraform apply -auto-approveBelow are screenshots of the AWS Management Console showing the created infrastructure components
Testing the RDS Proxy Connection
Now that we’ve provisioned RDS Proxy and configured our infrastructure using Terraform, it’s time to test the connectivity to the database. We’ll set up an Amazon EC2 instance and install MySQL to simulate an application server. Then, we’ll verify that the EC2 instance can connect to the RDS database through the RDS Proxy.
Setting Up an EC2 Instance
First, launch an Amazon EC2 instance in the same VPC where your RDS Proxy and RDS database are deployed. You can use the AWS Management Console or the AWS CLI to create the instance. Make sure to choose the appropriate security group that allows outbound traffic on port 3306 (MySQL default port) to reach the RDS Proxy.
Installing MySQL Client
Once the EC2 instance is running, SSH into the instance and install the MySQL client. You can install it using the package manager available on your EC2 instance’s operating system.
sudo apt update
sudo apt install mysql-server
Testing Database Connectivity
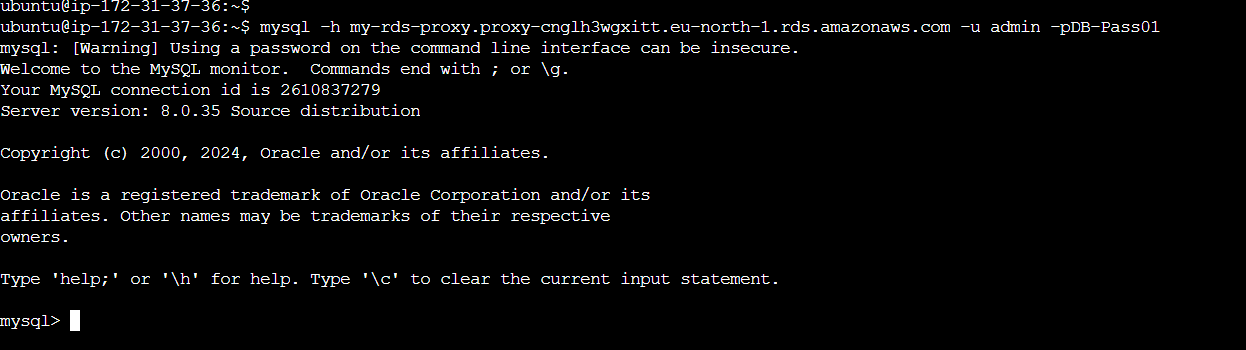
After installing the MySQL client, you can test the connectivity to the RDS database via the RDS Proxy. Replace rds-proxy-endpoint with the actual endpoint of your RDS Proxy and database-user with the database username:
mysql -h rds-proxy-endpoint -u database-user -pYou’ll be prompted to enter the database password. After providing the correct password, you should successfully connect to the database through the RDS Proxy.
SHOW DATABASES;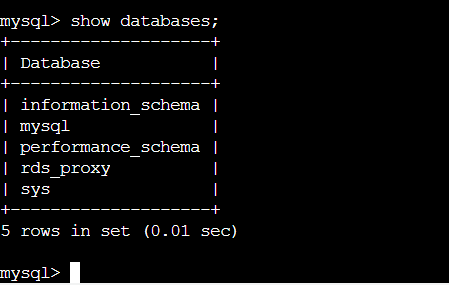
Source Code on GitHub
To access the complete source code used in this article, you can check out the following GitHub repository: link_to_github_repository.
Conclusion
In conclusion, leveraging RDS Proxy for centralized database access with Terraform offers a powerful solution for simplifying database management and enhancing performance on AWS. By consolidating and optimizing database connections, RDS Proxy streamlines access to RDS instances, improving scalability, reliability, and security for your applic
Leave a Reply