
How to Scale WordPress on AWS
This document was originally written by "Kemane Donfack" on the blog: https://blog.numericaideas.com/aws-scale-wordpress
The YouTube Channels in both English (En) and French (Fr) are now accessible, Feel free to subscribe by clicking here.
Introduction
In today’s article, we will explore the scalability possibilities of deploying WordPress on AWS. Building upon our previous article on deploying WordPress on a 2-Tier AWS architecture with Terraform, we will focus on utilizing the Auto Scaling Group (ASG) feature, along with leveraging Amazon S3 for media storage and CloudFront for caching. These enhancements will enable us to scale our WordPress deployment effectively and handle increasing traffic demands. So let’s dive in!
If you haven’t read the previous article, Deploying WordPress on a 2-Tier AWS Architecture with Terraform, we highly recommend checking it out first. It provides a comprehensive guide on setting up the initial 2-Tier architecture, which forms the foundation for this scalability enhancement.
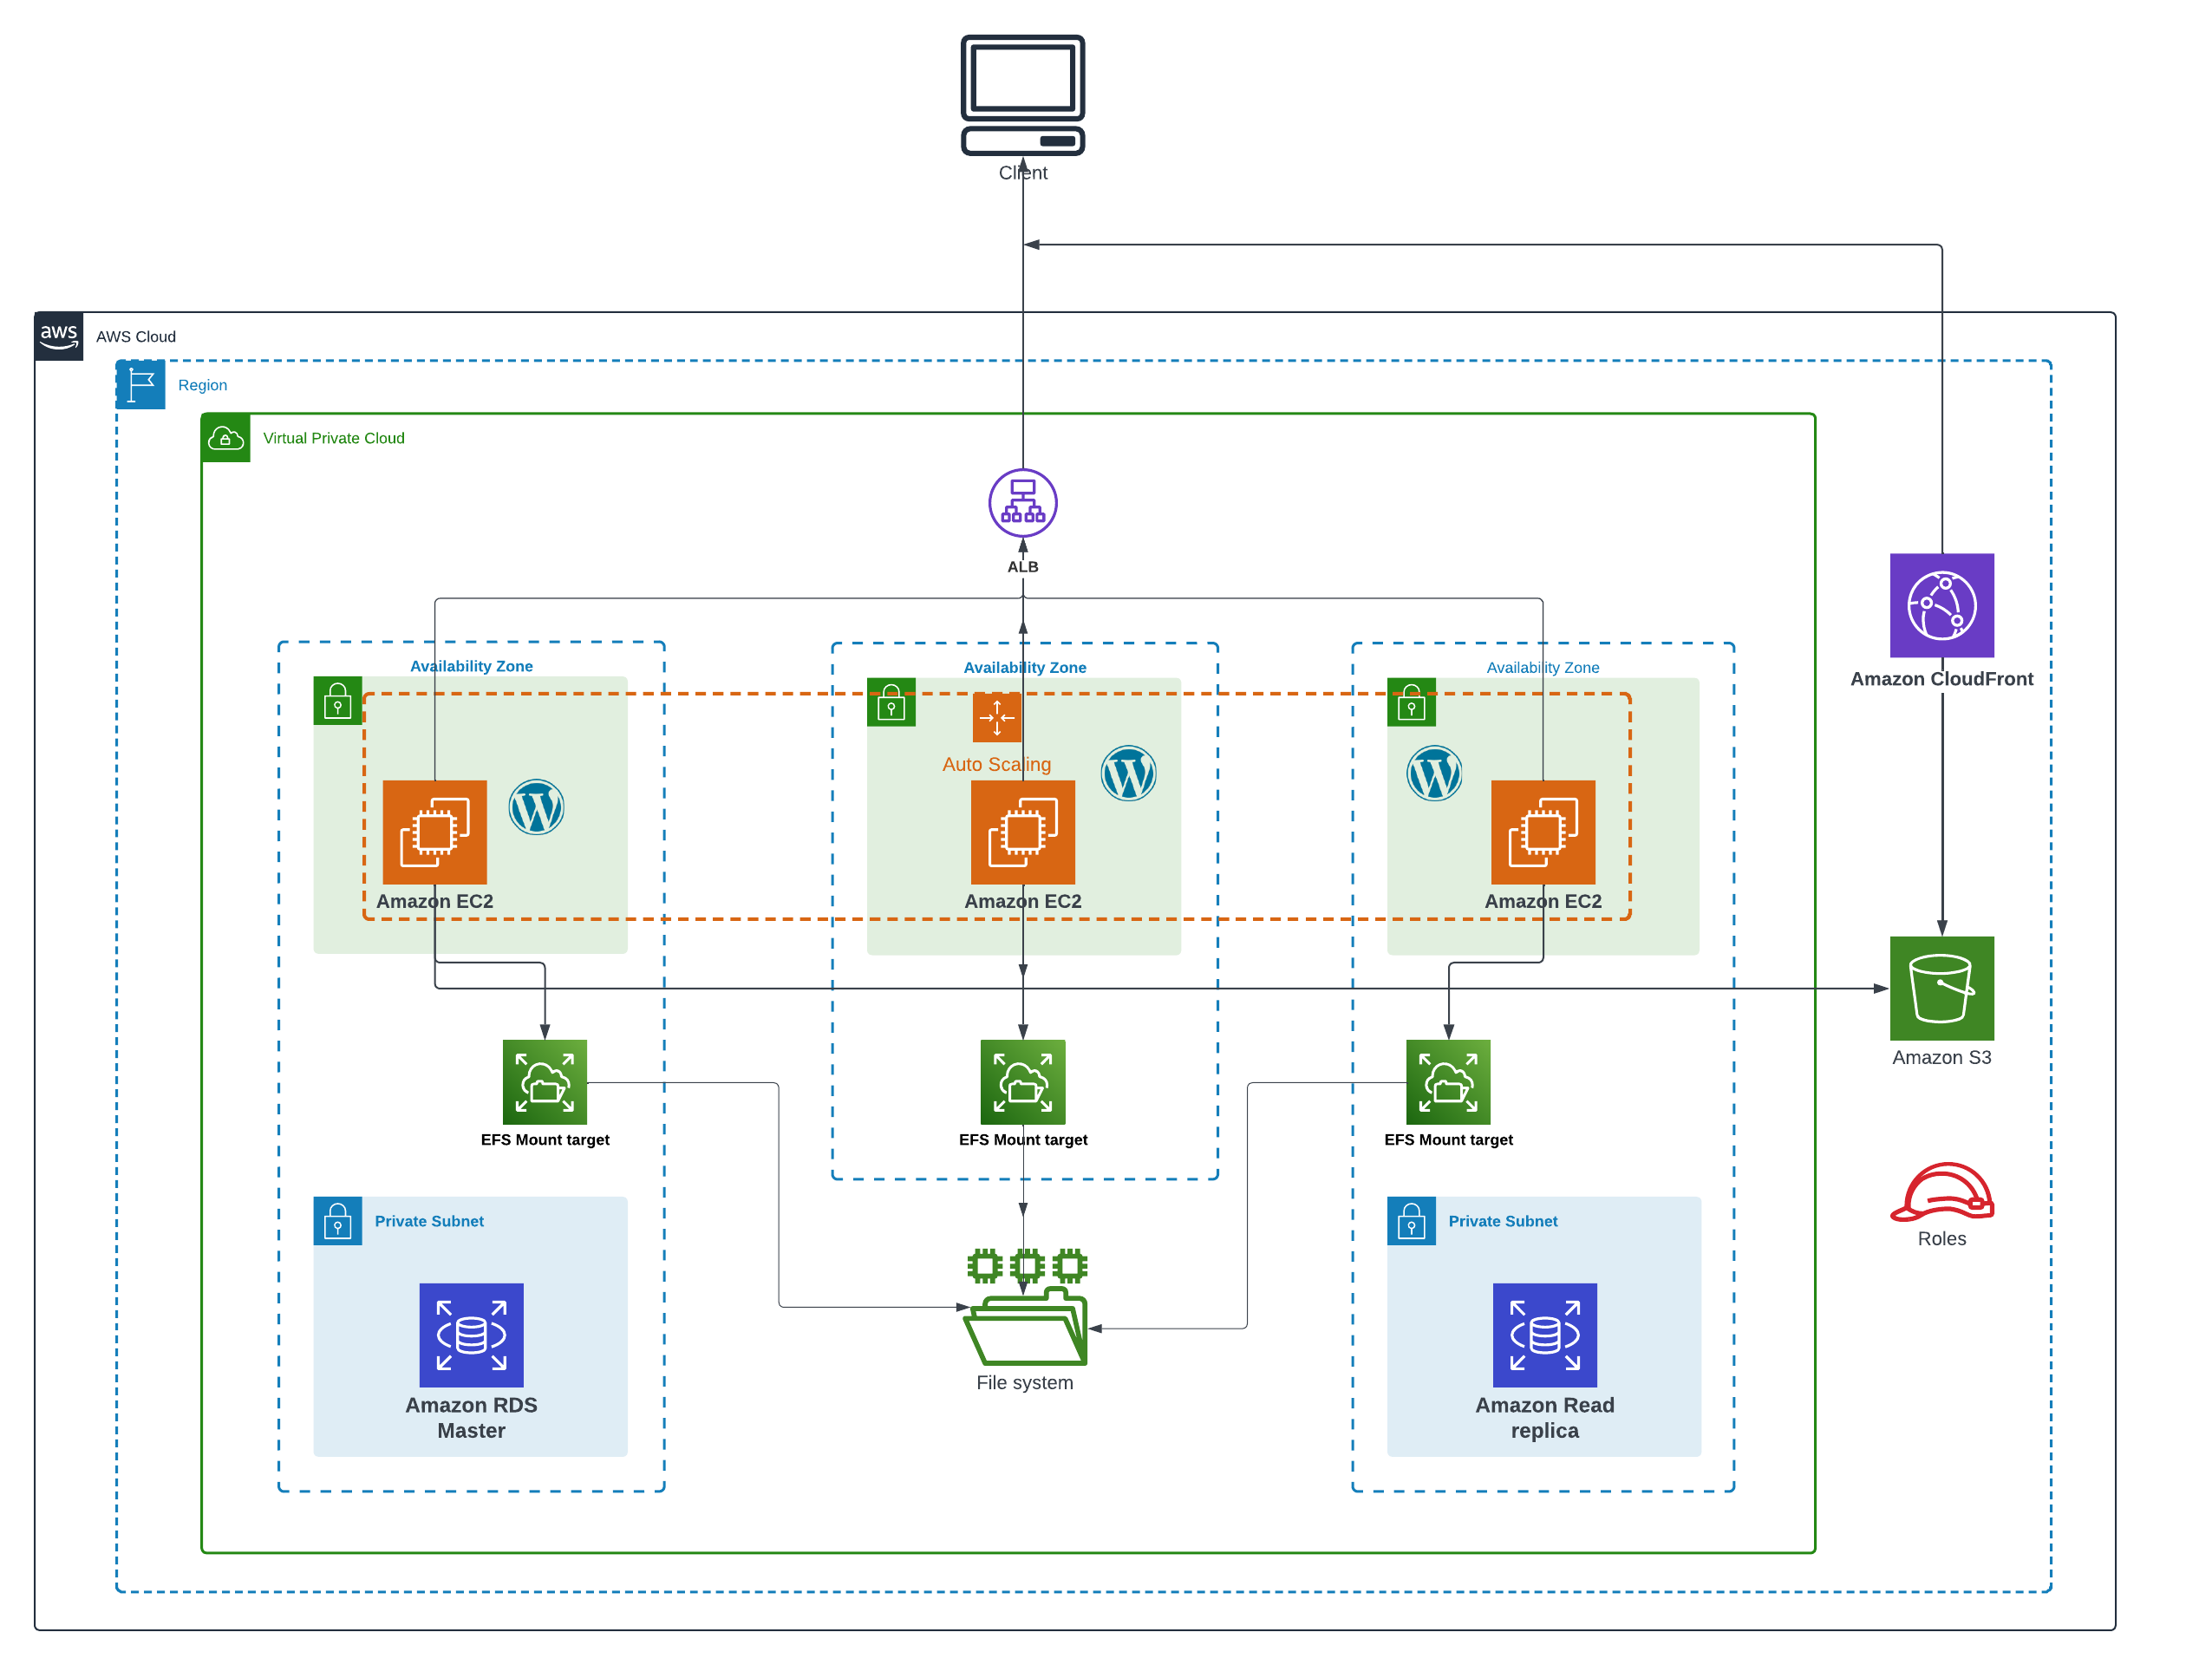
Scalable Architecture
To make the deployment of WordPress scalable on AWS, we used several strategies detailed in the illustration and sections below:
Horizontal Scaling with Auto Scaling Groups
Auto Scaling Groups provide us with the means to dynamically adjust the number of EC2 instances that power our WordPress site in response to changing demand. This dynamic capability enables horizontal scaling, allowing us to efficiently manage varying traffic loads.
By establishing automatic scaling policies, we ensure that the capacity of our WordPress fleet can automatically expand or contract based on performance metrics, such as CPU utilization. This approach leads to high availability and cost efficiency, as opposed to maintaining a fixed number of EC2 instances.
Furthermore, Auto Scaling Groups offer built-in health checks and automatic instance replacement, contributing to a self-healing infrastructure.
Optimized Media Delivery with S3 and CloudFront
Transferring static media assets, such as images, videos, and files, to an S3 bucket not only relieves the load and storage pressure on the WordPress application servers but also enhances performance.
By leveraging a global Content Delivery Network (CDN) like CloudFront, we can minimize latency by caching content closer to end users at edge locations. This, in turn, reduces origin requests to the S3 bucket.
This optimized media delivery setup results in lower costs and improved overall performance.
Shared Storage with EFS
Employing Elastic File System (EFS) enables the WordPress instances within the Auto Scaling Group to seamlessly share files and data.
EFS offers a scalable and high-performance Network File System (NFS) that can be accessed concurrently by multiple EC2 instances.
This shared file storage is pivotal for the horizontal scaling of WordPress, ensuring that essential files such as plugins, themes, and uploads are consistently accessible across the entire fleet.
Read Replicas for RDS
We can take advantage of Read Replicas for our RDS database to alleviate the load on the primary instance. This is particularly useful for queries that involve extensive reading, such as reporting tasks.
Read Replicas not only contribute to horizontally scaling database reads but also enhance overall database availability.
Prerequisites
Before we proceed with scaling our WordPress deployment on AWS, make sure you have the following prerequisites in place
- An
AWS accountwith appropriate permissions to create resources. - Basic knowledge of
Terraformand its concepts. - Read the previous article: Deploying WordPress on a 2-Tier AWS Architecture with Terraform
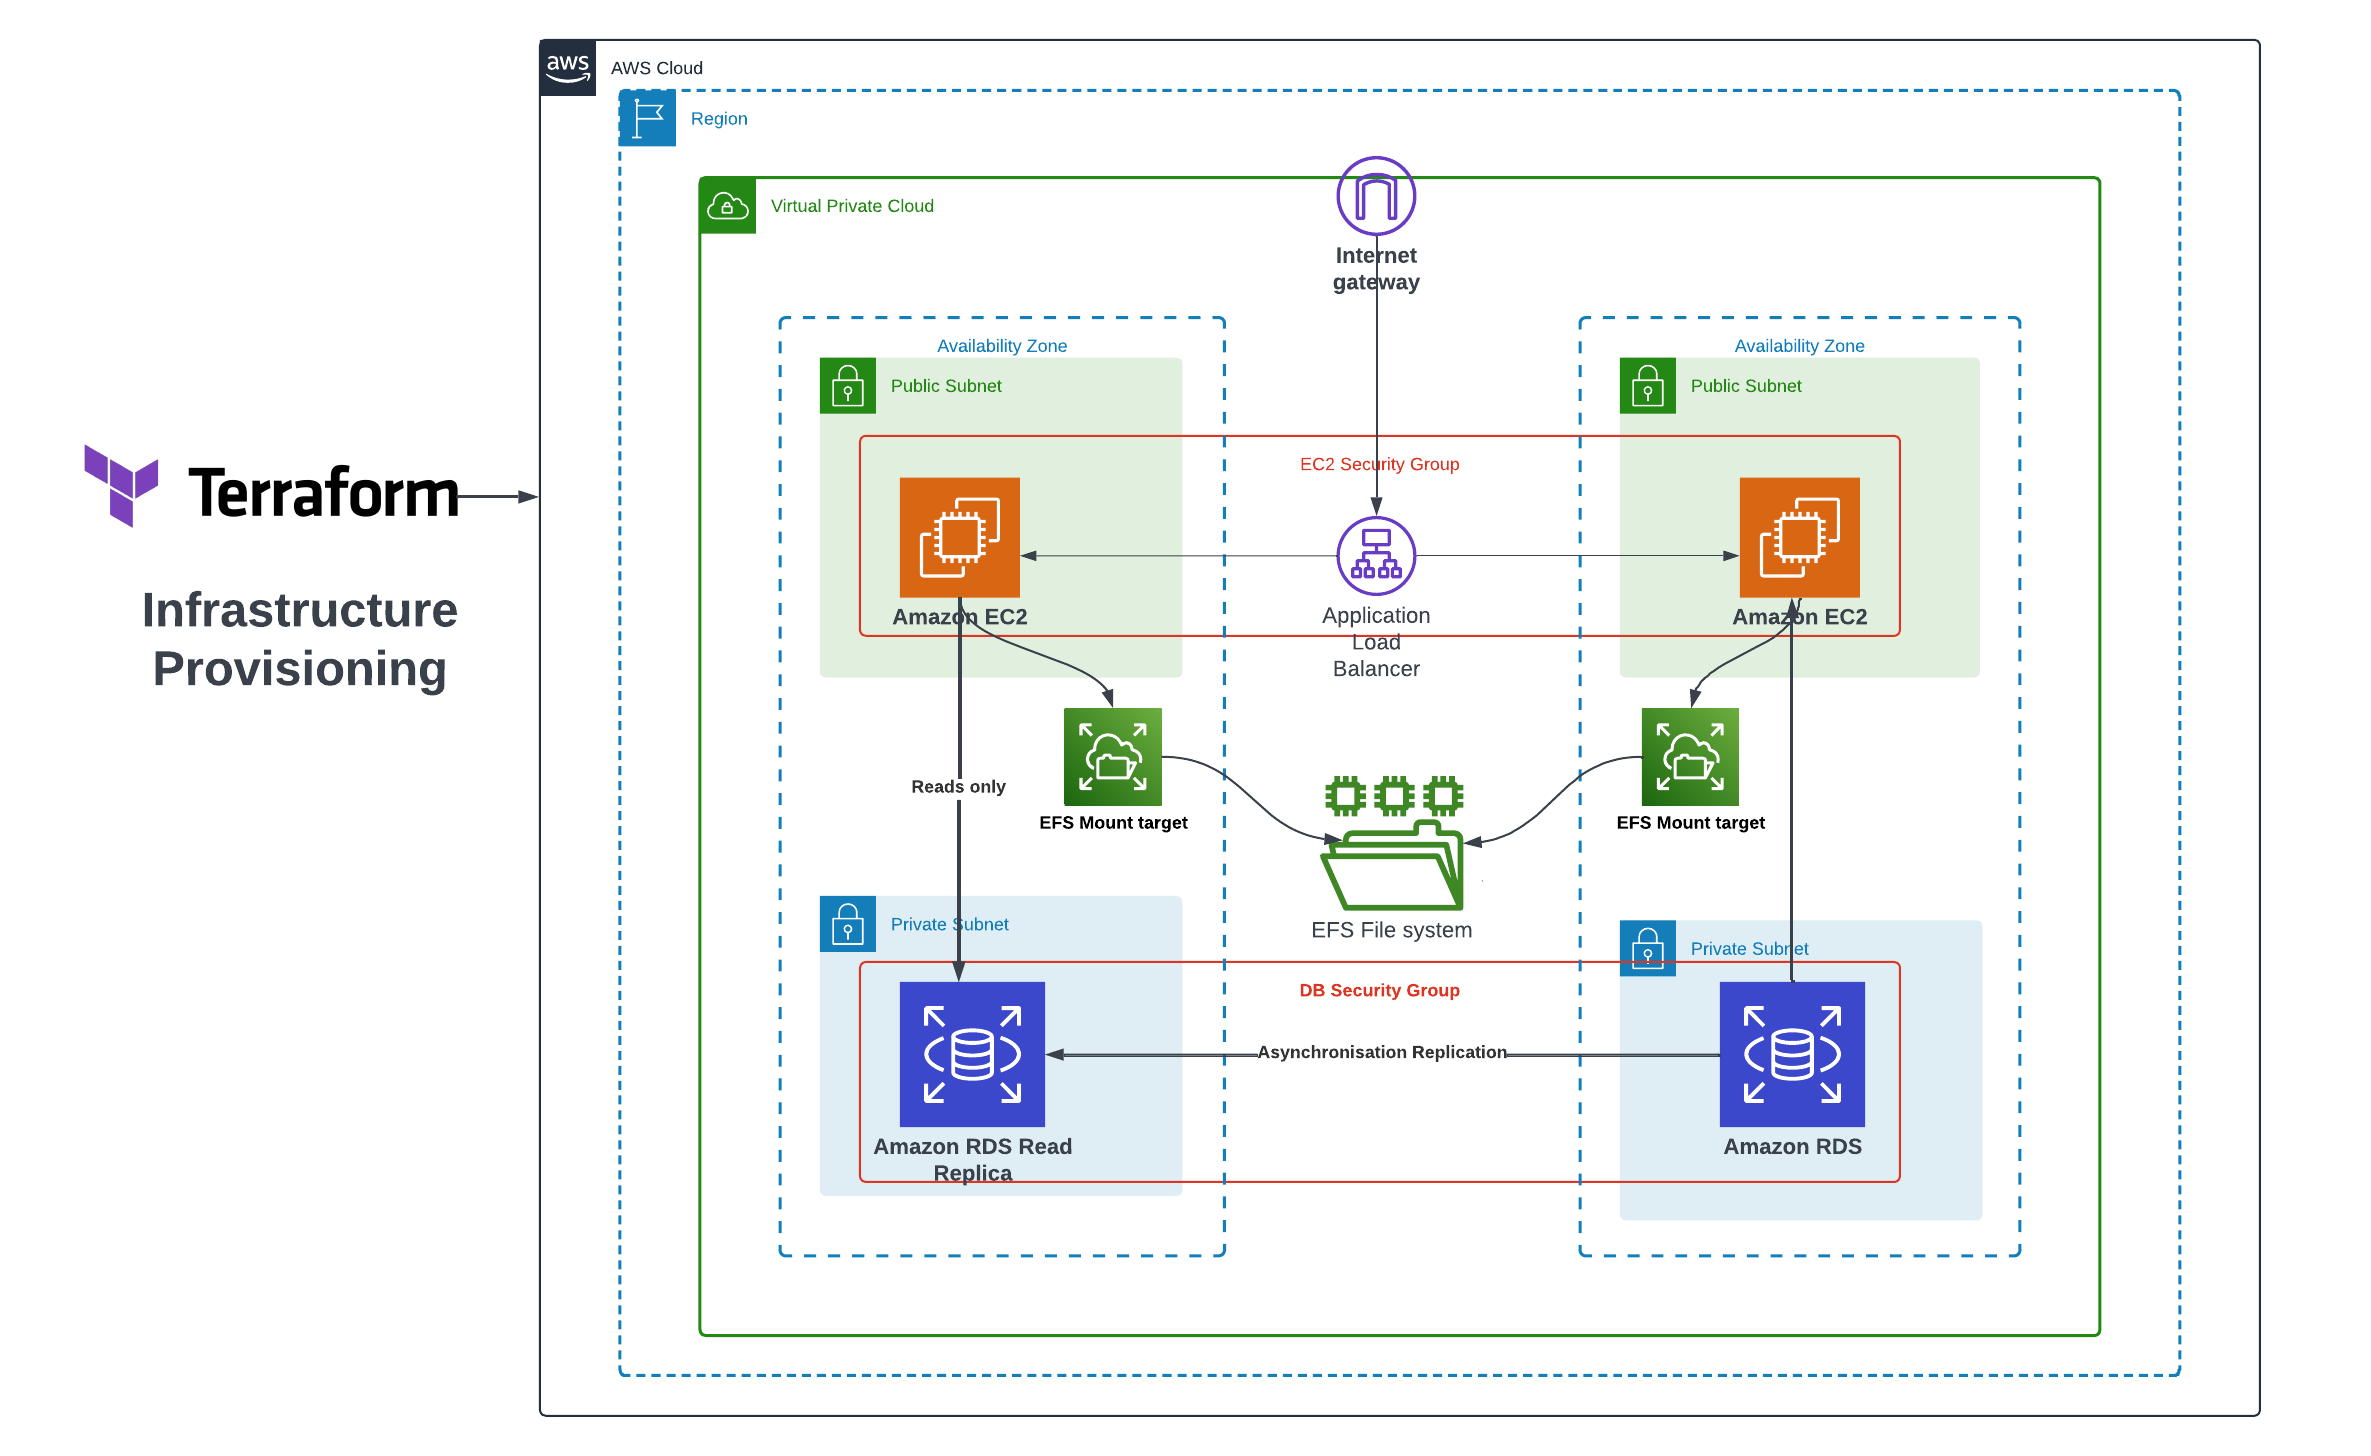
Using Auto Scaling Group for Scalability
By using ASG, we can ensure our WordPress deployment can scale horizontally to handle varying loads.
In this section, we’ll explain the modifications made to the existing Terraform files to incorporate ASG into our WordPress deployment.
If you would like to delve deeper into the concept of Auto Scaling Group and its benefits, we have a dedicated article that covers it in detail. It provides valuable insights into how ASG works, and its configuration options.
Auto Scaling Group in AWS
Step 1: Modify main.tf
In this step, we are going to make significant changes to the main.tf file and introduce a new file called install_script.tpl in our current directory, which will automate the installation of the tools needed to keep our WordPress website running smoothly.
First, let’s take a look at the install_script.tpl file:
install_script.tpl
#!/bin/bash

sudo yum update -y
sudo yum install docker -y
wget https://github.com/docker/compose/releases/latest/download/docker-compose-$(uname -s)-$(uname -m)
sudo mv docker-compose-$(uname -s)-$(uname -m) /usr/local/bin/docker-compose
sudo chmod -v +x /usr/local/bin/docker-compose
sudo systemctl enable docker.service
sudo systemctl start docker.service
sudo yum -y install amazon-efs-utils
sudo mkdir -p ${mount_directory}
sudo mount -t efs -o tls ${efs_volume_id}:/ ${mount_directory}
sudo docker run --restart=always --name wordpress-docker -e WORDPRESS_DB_USER=${dbuser} -e WORDPRESS_DB_HOST=${dbendpoint} -e WORDPRESS_DB_PASSWORD=${dbpassword}  -e WORDPRESS_DB_NAME=${db_name} -v ${mount_directory}:${mount_directory} -p 80:80 -d wordpress
The install_script.tpl file is a Bash script that will be used as the user data for our EC2 instances. It installs Docker, sets up Amazon EFS, and runs a WordPress container to deploy our website. The script is designed to work with the variables passed to it when called.
Next, we will modify the main.tf file to incorporate the changes. We will remove the two aws_instance resources and introduce the aws_launch_template resource, which defines the configuration for our EC2 instances.
resource "aws_launch_template" "instances_configuration" {
  name_prefix            = "asg-instance"
  image_id               = var.ami
  key_name               = var.key_name
  instance_type          = var.instance_type
  user_data              = base64encode(templatefile("install_script.tpl", { efs_volume_id = aws_efs_file_system.efs_volume.id, db_name = aws_db_instance.rds_master.db_name, mount_directory = var.mount_directory, dbuser = aws_db_instance.rds_master.username, dbendpoint = aws_db_instance.rds_master.endpoint, dbpassword = aws_db_instance.rds_master.password }))
  vpc_security_group_ids = [aws_security_group.production-instance-sg.id]

  iam_instance_profile {
    name = aws_iam_instance_profile.ec2_wordpress_instance_profile.name
  }

  lifecycle {
    create_before_destroy = true
  }

  tags = {
    Name = "asg-instance"
  }
}
In the same main.tf file, we’ll create the Autoscaling Group aws_autoscaling_group resource. The ASG will be responsible for managing the number of instances and ensuring they match the desired capacity.
resource "aws_autoscaling_group" "asg" {
  name                      = "asg"
  min_size                  = 3
  max_size                  = 6
  desired_capacity          = 3
  health_check_grace_period = 150
  health_check_type         = "ELB"
  vpc_zone_identifier       = [aws_subnet.ec2_1_public_subnet.id, aws_subnet.ec2_2_public_subnet.id, aws_subnet.ec2_3_public_subnet.id]
  launch_template {
    id      = aws_launch_template.instances_configuration.id
    version = "$Latest"
  }

  tag {
    key                 = "Name"
    value               = "production-instance"
    propagate_at_launch = true
  }

  depends_on = [
    aws_db_instance.rds_master,
  ]
}
Next, we’ll define an Auto Scaling policy that will dynamically adjust the number of instances in our Auto Scaling group based on CPU utilization. In addition, thanks to the aws_autoscaling_attachmentresource we will link our Auto Scaling Group to the Application Load Balancer (ALB).
main.tf
resource "aws_autoscaling_policy" "avg_cpu_policy_greater" {
  name                   = "avg-cpu-policy-greater"
  policy_type            = "TargetTrackingScaling"
  autoscaling_group_name = aws_autoscaling_group.asg.id
  # CPU Utilization is above 50
  target_tracking_configuration {
    predefined_metric_specification {
      predefined_metric_type = "ASGAverageCPUUtilization"
    }
    target_value = 50.0
  }

}

resource "aws_autoscaling_attachment" "asg_attachment" {
  autoscaling_group_name = aws_autoscaling_group.asg.id
  lb_target_group_arn    = aws_lb_target_group.alb_target_group.arn
}
Step 2: Modify loadbalancer.tf
To ensure that the ALB handles incoming HTTP traffic on port 80 and distributes it evenly across the instances in the ASG, we modified the loadbalancer.tf file as follows:
resource "aws_lb" "alb" {
  name               = "asg-alb"
  internal           = false
  load_balancer_type = "application"
  security_groups    = [aws_security_group.alb_sg.id]
  subnets            = [aws_subnet.ec2_1_public_subnet.id, aws_subnet.ec2_2_public_subnet.id, aws_subnet.ec2_3_public_subnet.id]
}

resource "aws_lb_listener" "alb_listener" {
  load_balancer_arn = aws_lb.alb.arn
  port              = "80"
  protocol          = "HTTP"

  default_action {
    type             = "forward"
    target_group_arn = aws_lb_target_group.alb_target_group.arn
  }
}

resource "aws_lb_target_group" "alb_target_group" {
  name     = "asg-target-group"
  port     = 80
  protocol = "HTTP"
  vpc_id   = aws_vpc.infrastructure_vpc.id
}
We have also created a security group for the ALB
security_group.tf
resource "aws_security_group" "alb_sg" {
  name = "asg-alb-sg"
  ingress {
    from_port   = 80
    to_port     = 80
    protocol    = "tcp"
    cidr_blocks = ["0.0.0.0/0"]
  }

  egress {
    from_port   = 0
    to_port     = 0
    protocol    = "-1"
    cidr_blocks = ["0.0.0.0/0"]
  }

  vpc_id = aws_vpc.infrastructure_vpc.id
}
Step 3: Modifying efs.tf
In this step, we will make significant changes to the efs.tf file.
We will remove the key_pair resource and the null_resource since they are no longer needed, and then proceed with the new content for our efs.tf file.
resource "aws_efs_file_system" "efs_volume" {
  creation_token = "efs_volume"
}

resource "aws_efs_mount_target" "efs_mount_target_1" {
  file_system_id  = aws_efs_file_system.efs_volume.id
  subnet_id       = aws_subnet.ec2_1_public_subnet.id
  security_groups = [aws_security_group.efs_sg.id]
}

resource "aws_efs_mount_target" "efs_mount_target_2" {
  file_system_id  = aws_efs_file_system.efs_volume.id
  subnet_id       = aws_subnet.ec2_2_public_subnet.id
  security_groups = [aws_security_group.efs_sg.id]
}

resource "aws_efs_mount_target" "efs_mount_target_3" {
  file_system_id  = aws_efs_file_system.efs_volume.id
  subnet_id       = aws_subnet.ec2_3_public_subnet.id
  security_groups = [aws_security_group.efs_sg.id]
}
RDS Multi-AZ Configuration
Instead of using Read Replicas, we will opt for a Multi-AZ configuration for our RDS instance. This configuration ensures high availability for our database by automatically creating a replica in a different availability zone. In case of a primary zone failure, replication will automatically switch to the replica in the backup availability zone, thus ensuring uninterrupted operations.
Here’s how to configure our RDS Multi-AZ instance in Terraform main.tf:
resource "aws_db_instance" "rds_master" {
  identifier              = "master-rds-instance"
  allocated_storage       = 10
  engine                  = "mysql"
  engine_version          = "5.7.37"
  instance_class          = "db.t3.micro"
  db_name                 = var.db_name
  username                = var.db_user
  password                = var.db_password
  backup_retention_period = 7
  multi_az                = true
  db_subnet_group_name    = aws_db_subnet_group.database_subnet.id
  skip_final_snapshot     = true
  vpc_security_group_ids  = [aws_security_group.database-sg.id]
  storage_encrypted       = true

  tags = {
    Name = "my-rds-master"
  }
}
Creating IAM Role for EC2 Instances
In this section, we will create an IAM role that allows our WordPress application running on EC2 instances to securely access the S3 bucket. This IAM role will have the necessary permissions to perform actions such as ListAllMyBuckets, GetObject, and PutObject on specific S3 resources.
Step 1: Creating IAM Policy for S3 Access
First, let’s modify the IAM policy resource to specify the more specific permissions required for the EC2 instances to interact with the S3 bucket securely.
resource "aws_iam_policy" "ec2_wordpress_policy" {
  name = "ec2_wordpress_policy"
  policy = jsonencode({
    Version = "2012-10-17"
    Statement = [
      {
        Effect   = "Allow"
        Action   = "s3:ListAllMyBuckets"
        Resource = "*"
      },
      {
        Effect   = "Allow"
        Action   = "s3:*"
        Resource = "arn:aws:s3:::${var.bucket_name}"
      },
      {
        Effect   = "Allow"
        Action   = "s3:*"
        Resource = "arn:aws:s3:::${var.bucket_name}/*"
      },
    ]
  })
}
In this IAM policy, we have specified three statements:
- The first statement allows the EC2 instances to list all S3 buckets (
s3:ListAllMyBuckets) on any resource (Resource = "*"). - The second statement allows the EC2 instances to perform any S3 action (
s3:*) on the specific S3 bucket with the ARNarn:aws:s3:::${var.bucket_name}. The variablevar.bucket_namerefers to the name of the S3 bucket you have specified in your Terraform configuration. - The third statement allows the EC2 instances to perform any S3 action (
s3:*) on any object within the specified S3 bucket (Resource = "arn:aws:s3:::${var.bucket_name}/*").
Step 2: Creating IAM Role for EC2 Instances
Next, let’s create the IAM role that will be associated with the EC2 instances.
resource "aws_iam_role" "ec2_wordpress_role" {
  name               = "ec2_wordpress_role"
  assume_role_policy = jsonencode({
    Version   = "2012-10-17"
    Statement = [
      {
        Action    = "sts:AssumeRole"
        Effect    = "Allow"
        Sid       = "RoleForEC2"
        Principal = {
          Service = "ec2.amazonaws.com"
        }
      },
    ]
  })
}
In this updated IAM role resource, we have added specific permissions to the assume role policy, which grants permission to EC2 instances to assume this role. The policy allows EC2 instances to act as the role for the purpose of accessing other AWS resources.
Step 3: Attaching IAM Policy to IAM Role
Now, let’s attach the previously created IAM policy to the IAM role.
resource "aws_iam_role_policy_attachment" "ec2_wordpress_policy_attachment" {
  policy_arn = aws_iam_policy.ec2_wordpress_policy.arn
  role       = aws_iam_role.ec2_wordpress_role.name
}
In this step, we associate the IAM policy with ARN aws_iam_policy.ec2_wordpress_policy.arn to the IAM role named aws_iam_role.ec2_wordpress_role.name. This attachment ensures that the permissions defined in the IAM policy are now associated with the IAM role.
Step 4: Creating IAM Instance Profile for EC2 Instances
Finally, let’s create an IAM instance profile, which allows us to associate the IAM role with EC2 instances.
resource "aws_iam_instance_profile" "ec2_wordpress_instance_profile" {
  name = "ec2_wordpress_instance_profile"
  role = aws_iam_role.ec2_wordpress_role.name
}
In this step, we create an instance profile named ec2_wordpress_instance_profile and associate it with the IAM role aws_iam_role.ec2_wordpress_role.name. This instance profile allows our EC2 instances to assume the IAM role, granting them the necessary permissions to interact securely with the S3 bucket.
With these changes, our EC2 instances will now have the required permissions to access the specified S3 bucket securely, ensuring the smooth functioning of our WordPress application.
Creating S3 Bucket and CloudFront distribution
In this section, we’ll create an S3 bucket to store the media files of the WordPress application and set up a CloudFront distribution to cache and serve these assets globally, providing improved performance and reduced latency for users.
Before starting add these two variables in your variables.tf file
variable "bucket_name" {
  type    = string
  default = "my-s3-wordpress-bucket"
}

variable "s3_origin_id" {
  type    = string
  default = "my-s3-wordpress-origin"
}
Step 1: Creating the S3 Bucket
First, we define an S3 bucket resource using Terraform to store the media files of the WordPress application:
resource "aws_s3_bucket" "wordpress_files_bucket" {
  bucket = var.bucket_name
  tags   = {
    name = "wordpress-bucket"
  }
}
In this resource, we specify the desired bucket name as the value of the variable var.bucket_name. we also add a tag to the bucket for better identification.
Step 2: Configuring CloudFront Origin Access Control
Next, we configure the CloudFront Origin Access Control (OAC) to manage access to the S3 bucket:
locals {
  s3_origin_id = var.s3_origin_id
}

resource "aws_cloudfront_origin_access_control" "my_origin" {
  name                              = local.s3_origin_id
  description                       = "Origin access control"
  origin_access_control_origin_type = "s3"
  signing_behavior                  = "always"
  signing_protocol                  = "sigv4"
}
The aws_cloudfront_origin_access_control resource defines access control settings for the S3 bucket as an origin. we set the signing_behavior and signing_protocol to always and sigv4, respectively, to enforce the use of AWS Signature Version 4 for all requests made to the CloudFront distribution.
Step 3: Creating CloudFront Distribution
Now, we create the CloudFront distribution that will cache and serve the media files stored in the S3 bucket:
data "aws_cloudfront_cache_policy" "cache-optimized" {
  name = "Managed-CachingOptimized"
}

resource "aws_cloudfront_distribution" "s3_distribution" {
  origin {
    domain_name              = aws_s3_bucket.wordpress_files_bucket.bucket_regional_domain_name
    origin_access_control_id = aws_cloudfront_origin_access_control.my_origin.id
    origin_id                = local.s3_origin_id

  }

  enabled         = true
  is_ipv6_enabled = true
  comment         = "my-cloudfront"

  default_cache_behavior {
    cache_policy_id        = data.aws_cloudfront_cache_policy.cache-optimized.id
    allowed_methods        = ["DELETE", "GET", "HEAD", "OPTIONS", "PATCH", "POST", "PUT"]
    cached_methods         = ["GET", "HEAD"]
    target_origin_id       = local.s3_origin_id
    viewer_protocol_policy = "allow-all"
    min_ttl                = 0
    default_ttl            = 3600
    max_ttl                = 86400
  }

  price_class = "PriceClass_All"

  restrictions {
    geo_restriction {
      restriction_type = "none"
      locations        = []
    }
  }

  viewer_certificate {
    cloudfront_default_certificate = true
  }
}
In this resource, we define the CloudFront distribution and specify the S3 bucket as the origin to be associated with the distribution. The cache_policy_id refers to the managed caching policy named Managed-CachingOptimized, which optimizes cache behavior for better performance.
we also set the default_cache_behavior to cache the allowed HTTP methods and define caching TTLs (time-to-live) for the assets. The viewer_protocol_policy is set to allow-all to allow both HTTP and HTTPS access.
Additionally, we specify the CloudFront distribution to use the default SSL/TLS certificate provided by AWS (cloudfront_default_certificate = true) for secure connections.
Step 4: Configuring S3 Bucket Policy for CloudFront Access
Finally, we create an S3 bucket policy to allow CloudFront access to the bucket
data "aws_iam_policy_document" "s3_policy" {
  statement {
    sid       = "AllowCloudFrontServicePrincipal"
    actions   = ["s3:GetObject"]
    resources = ["${aws_s3_bucket.wordpress_files_bucket.arn}/*"]
    condition {
      test     = "StringEquals"
      variable = "AWS:SourceArn"
      values   = ["${aws_cloudfront_distribution.s3_distribution.arn}"]
    }
    principals {
      type        = "Service"
      identifiers = ["cloudfront.amazonaws.com"]
    }
  }
}

resource "aws_s3_bucket_policy" "mybucket" {
  bucket = aws_s3_bucket.wordpress_files_bucket.id
  policy = data.aws_iam_policy_document.s3_policy.json
}
In this step, we define an IAM policy document that allows the CloudFront service principal (cloudfront.amazonaws.com) to access the S3 bucket’s objects. The policy uses the aws_s3_bucket.wordpress_files_bucket.arn and the aws_cloudfront_distribution.s3_distribution.arn as resources to specify the S3 bucket and CloudFront distribution as the allowed sources.
Finally, we apply the defined S3 bucket policy using the aws_s3_bucket_policy resource.
With these configurations, the S3 bucket is ready to store WordPress media files, and the CloudFront distribution is set up to cache and serve these assets, providing faster and more reliable content delivery globally.
Deploying our Infrastructure
terraform initterraform validateterraform planterraform apply --auto-approveConfiguring WordPress to Use IAM Role for S3 Access
In this section, we’ll configure the wp-config.php file of our WordPress installation to utilize the IAM role we previously created. This will allow WordPress to securely access the S3 bucket.
Step 1: Connect to EC2 Instance via SSH
To configure the wp-config.php file, you can use one of the available methods to connect to one of the EC2 instances created by the Auto Scaling Group using SSH. One common method is using an SSH client that we’ll use

Step 2: Edit wp-config.php
Once connected to the EC2 instance, navigate to the WordPress installation directory and edit the wp-config.php file
cd /var/www/html
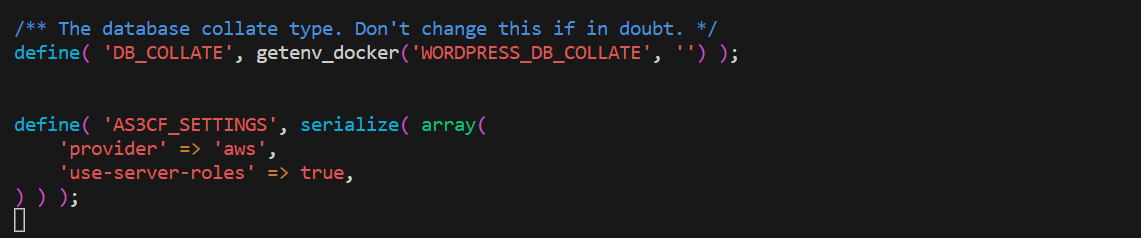
sudo vi wp-config.phpInside the wp-config.php file, locate the database connection settings, and add the following lines after the DB_COLLATE definition
define( 'AS3CF_SETTINGS', serialize( array(
    'provider' => 'aws',
    'use-server-roles' => true,
) ) );
Save the changes and exit the file.
Installing And Configuring WP Offload Plugin
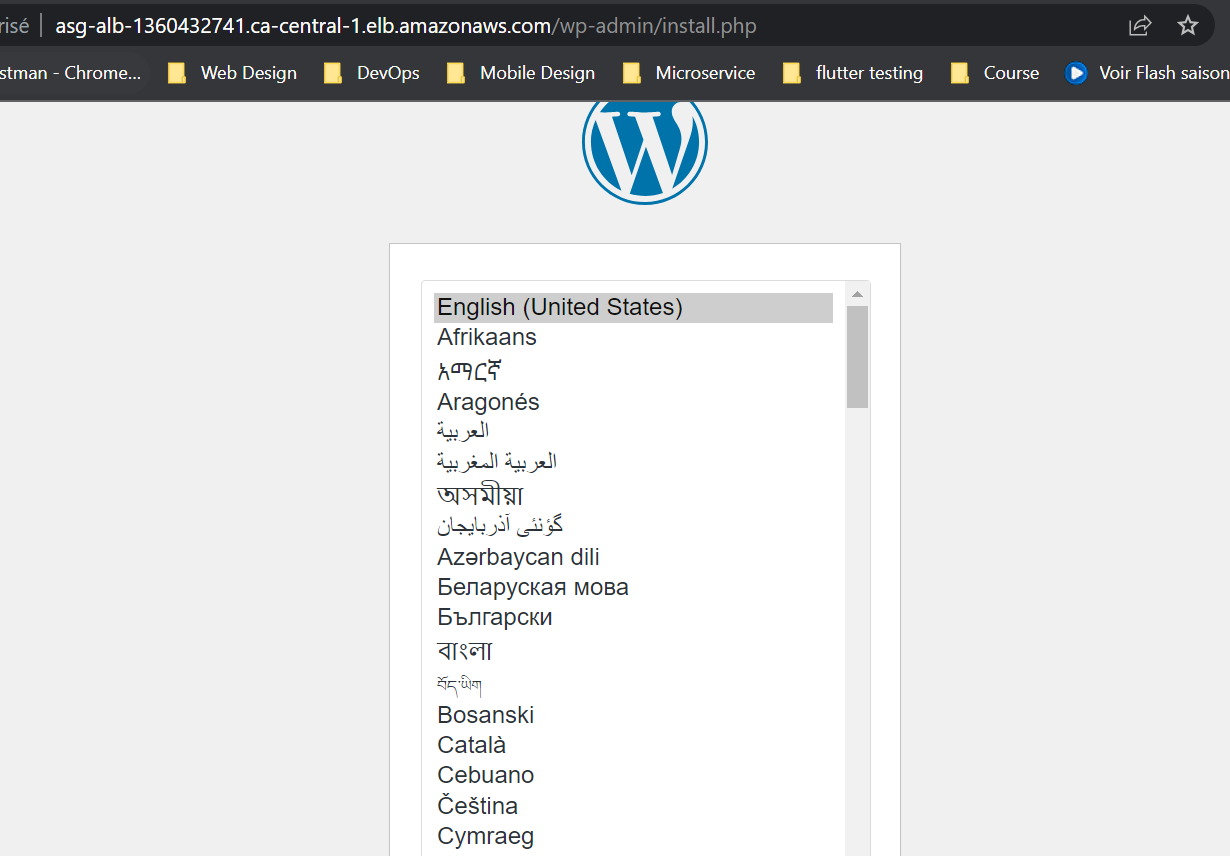
Step 1: Accessing WordPress via Load Balancer URL
Now that we have configured the wp-config.php file, access your WordPress website using the URL provided by the Load Balancer. This URL should point to your WordPress application hosted on the EC2 instances.
then configure your wordpress website
Step 2: Installing and Configuring WP Offload Plugin
Once you have accessed your WordPress website, follow these steps to install and configure the WP Offload Media Lite for Amazon S3 plugin
- In the WordPress dashboard, go to Plugins > Add New
- Search for WP Offload Media Lite for Amazon S3 and click Install Now.
- After installation, click Activate to activate the plugin.
- Go to Settings > WP Offload Media.
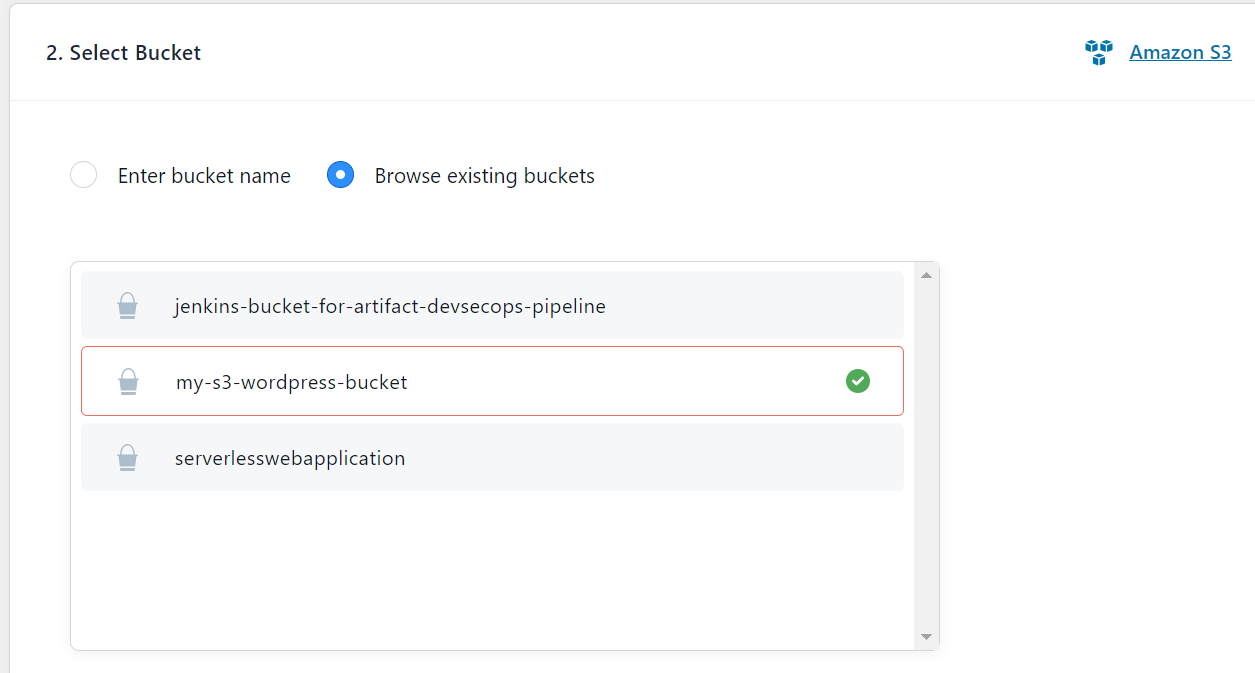
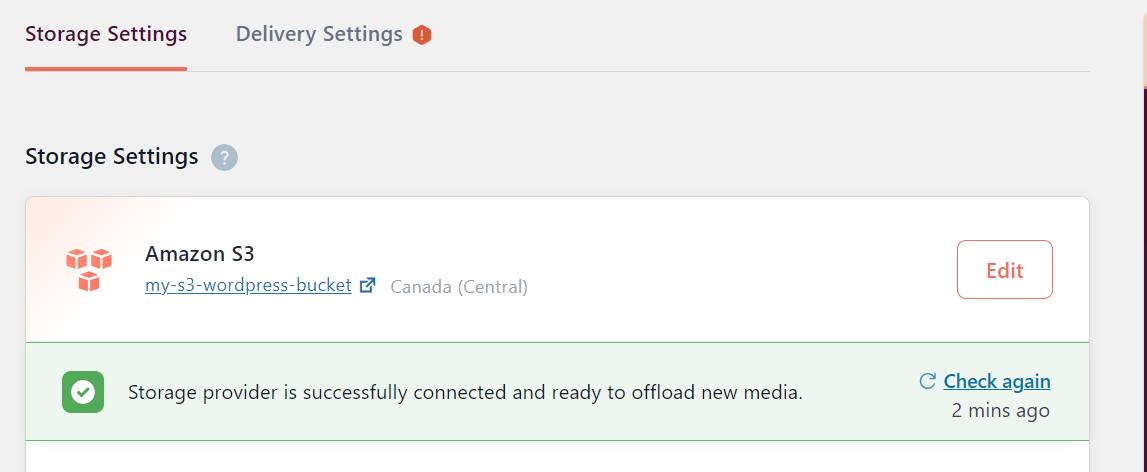
Under Bucket select Use Existing Bucket > Browse existing buckets then select the S3 bucket created previously and save.
On the security tab, leave all settings as default, then click on Keep Bucket Security As Is
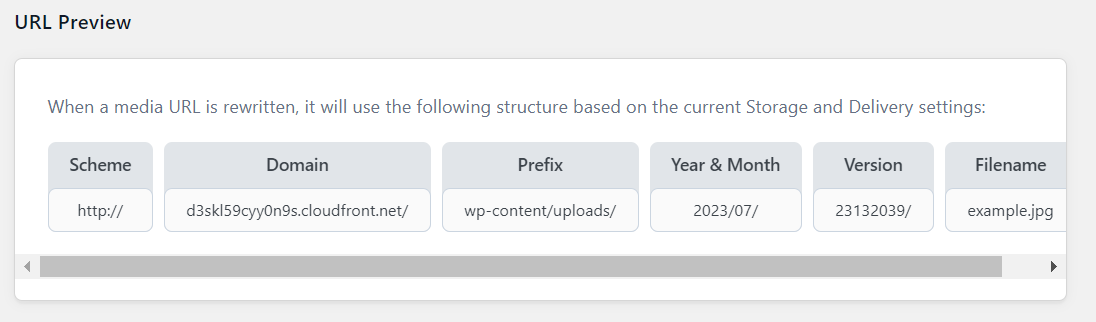
Go to Delivery Setting to configure CloudFront
Click on Edit then on choose Amazon CloudFront, then save
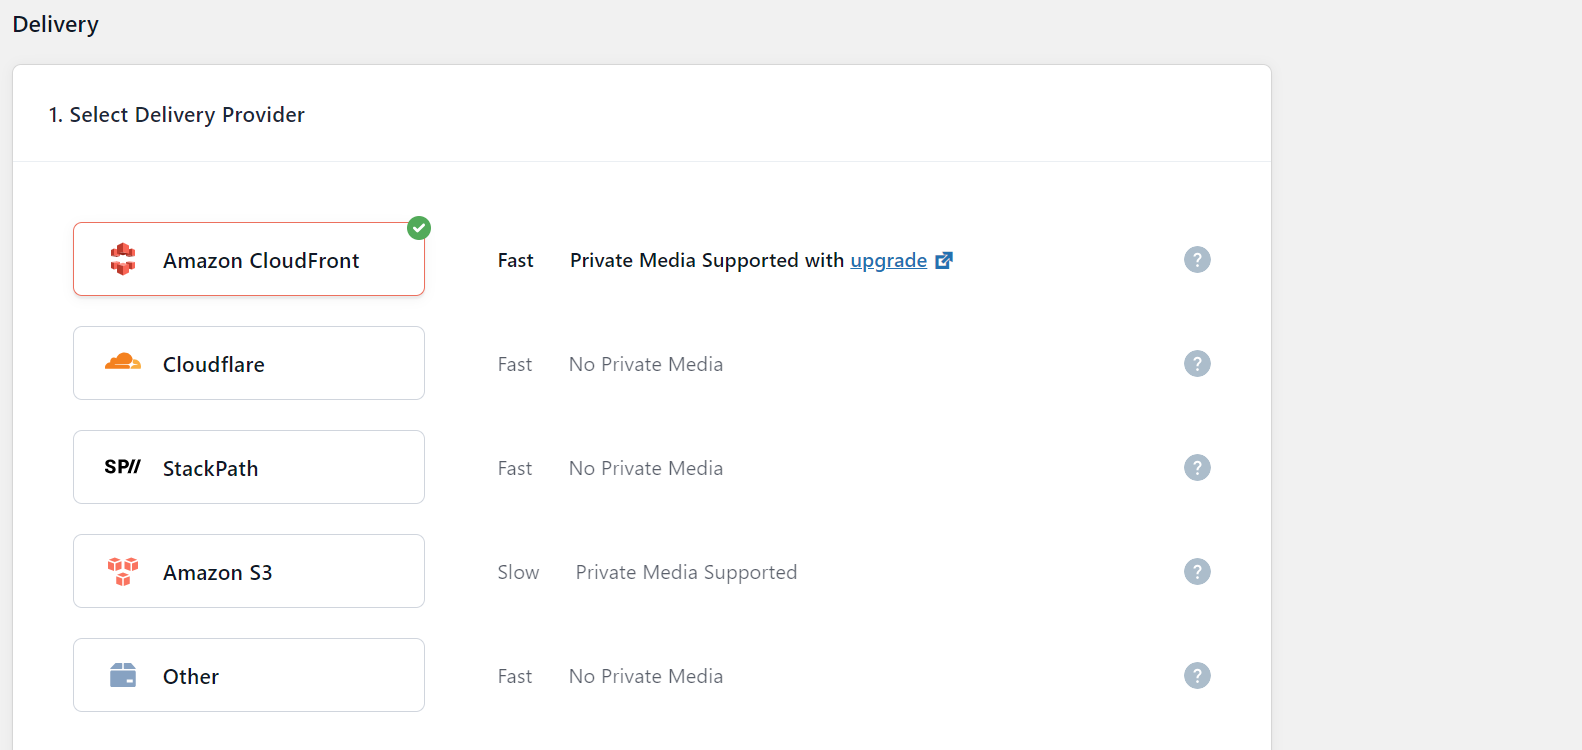
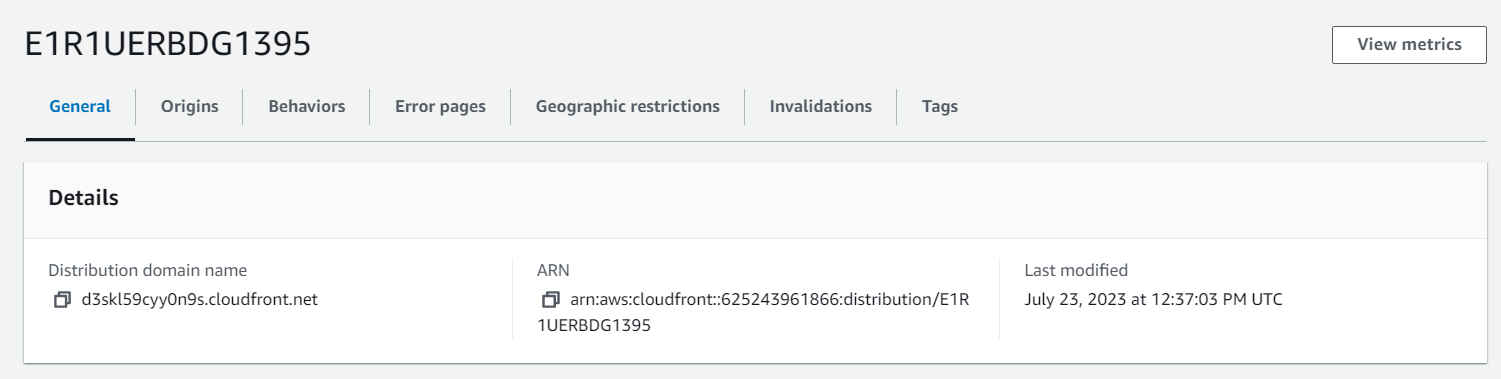
Click on Use Custom Domain Name (CNAME) and go to your CloudFront distribution to copy the Distribution Domain Name and paste it into the Use Custom Domain Name (CNAME) field.

Save your configuration.
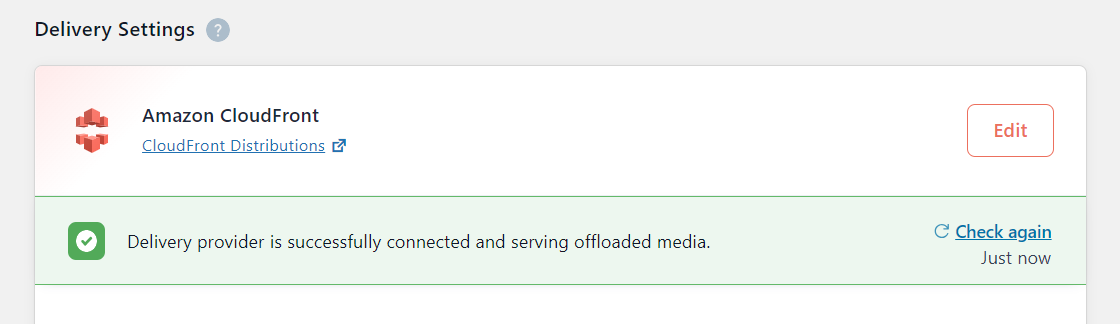
The WP Offload Media Lite for Amazon S3 plugin is now configured to use your S3 bucket and CloudFront distribution for storing and serving media files. All your media uploads will be automatically offloaded to the S3 bucket and served via CloudFront, reducing the load on your WordPress instances and improving the overall performance of your website.
Demo
For the demo go to Media > Add New and upload a new file then look at the file details
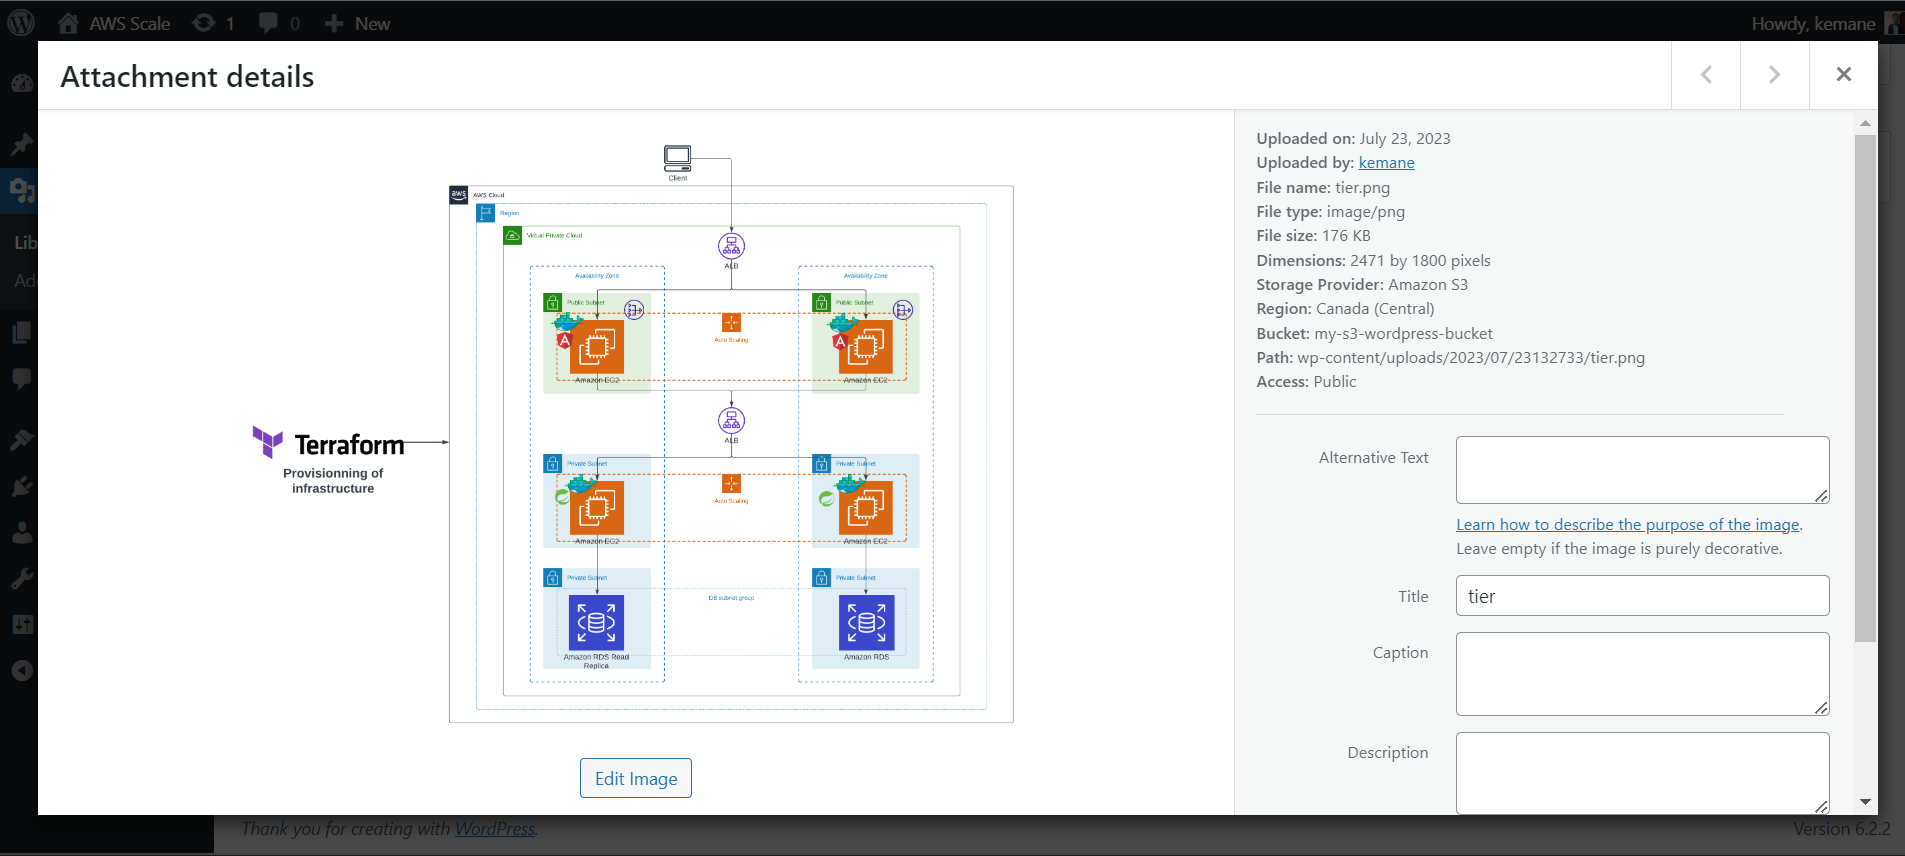
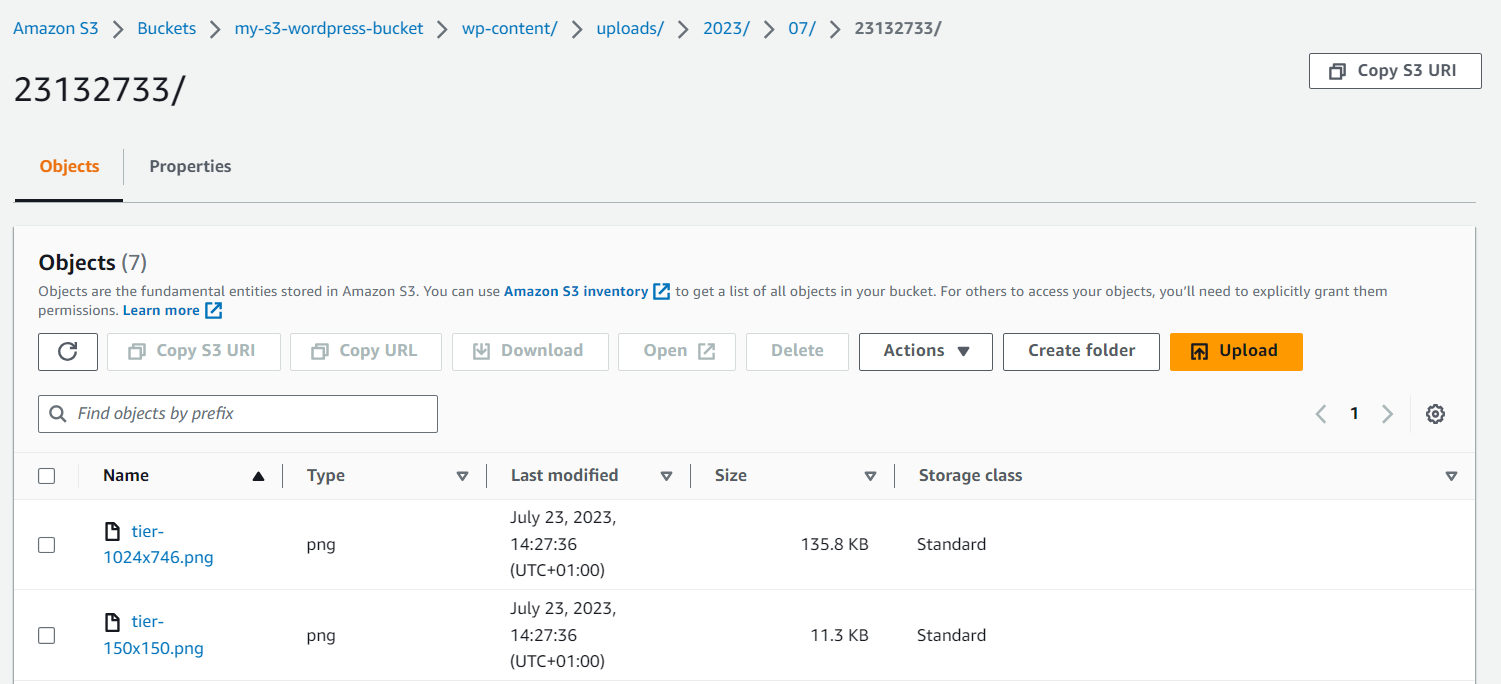
Go to your S3 bucket and you’ll also see your file
Congratulations! Your WordPress website is now successfully configured to use the IAM role for secure S3 access and WP Offload Media Lite for Amazon S3 plugin to store and serve media files from the S3 bucket via CloudFront, enhancing the scalability and performance of your website.
The complete source code of the project is available on GitHub.
Conclusion
In this article, we learned how to enhance our WordPress deployment on AWS by incorporating scalability features using Auto Scaling Group and optimizing media storage and delivery with S3 and CloudFront. By utilizing these powerful AWS services, you can ensure your WordPress application remains highly available, responsive, and cost-efficient as the traffic fluctuates.
Leave a Reply